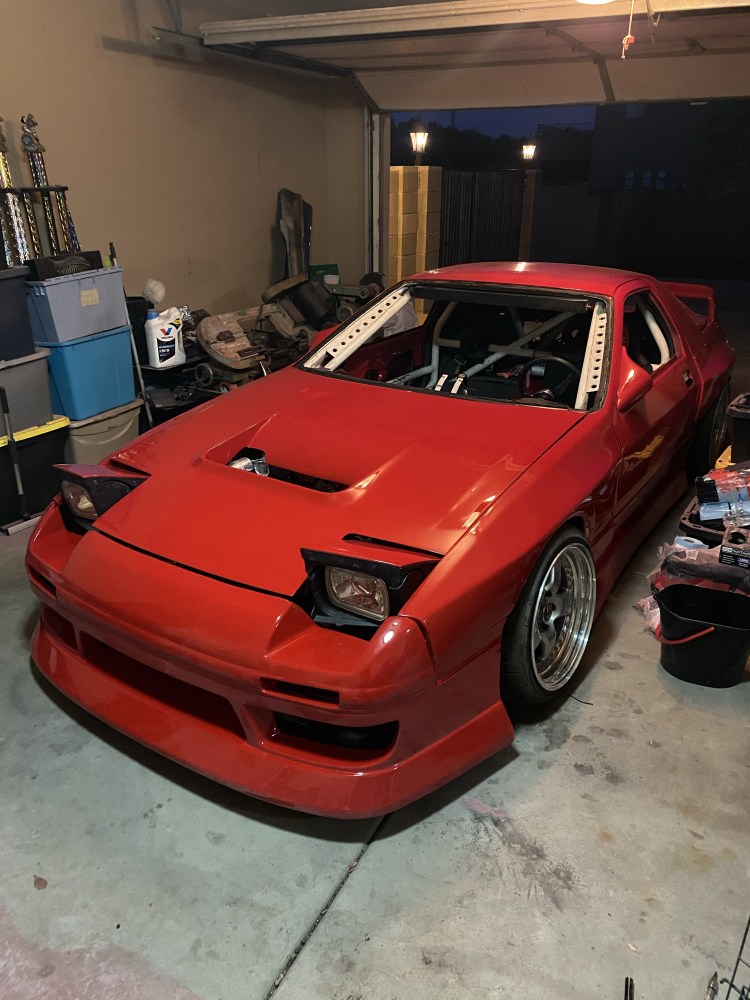
Welcome back, sit back and enjoy some updates. I don’t really know where to start since so much has changed since the last update. This post isn’t in order, but you’ll get the idea of what happened. After a series of unfortunate events, I missed getting the car done and working in time to drive Panic Grand Prix. I came back from the event with a vengeance to get the car ready to drive Jimmy Up Matsuri 6. (Matsuri will get its own update, this update is to cover the build leading up to the event.)
Step 1: Realize that things needed to change and it’s time to face the music. I had overbuilt the 1.6 into something that I didn’t really want. I essentially built a “race” engine that I figured I would have to constantly worry about, break down every off season to measure, inspect, and fine tune. The engine had just about every possible thing done that you can do to a 1.6, many things never got updated in this blog, but that’s ok. I still love the 1.6, but I know it’s been time to move on for a while. As much as I enjoy building cars, I really like driving!! I need to get back to a reliable and managable setup.
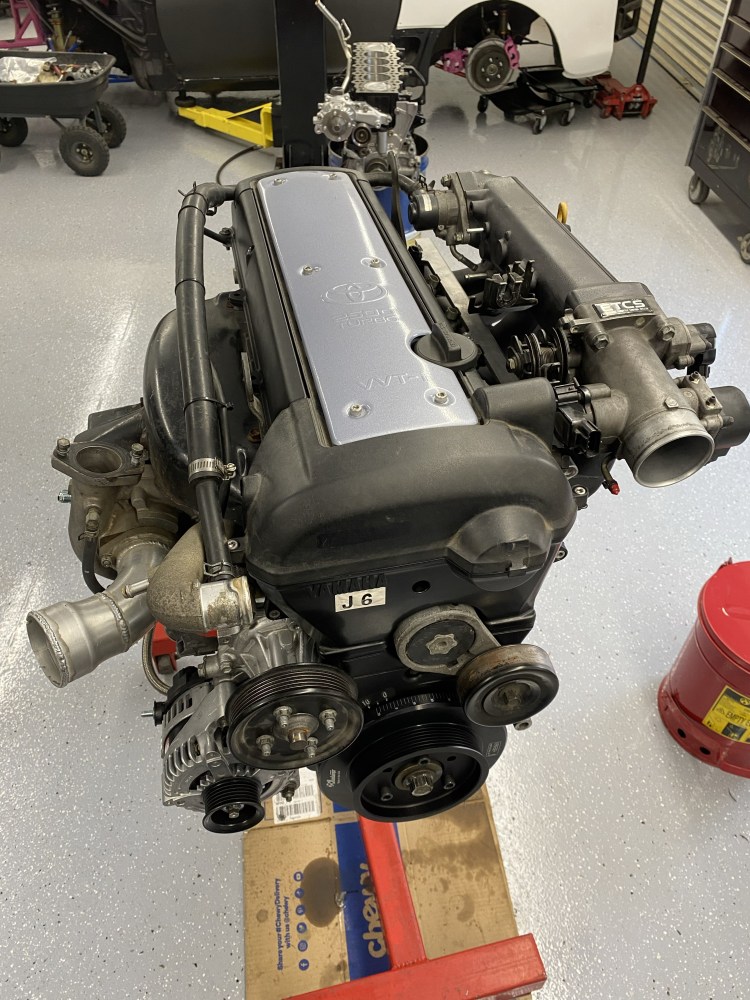
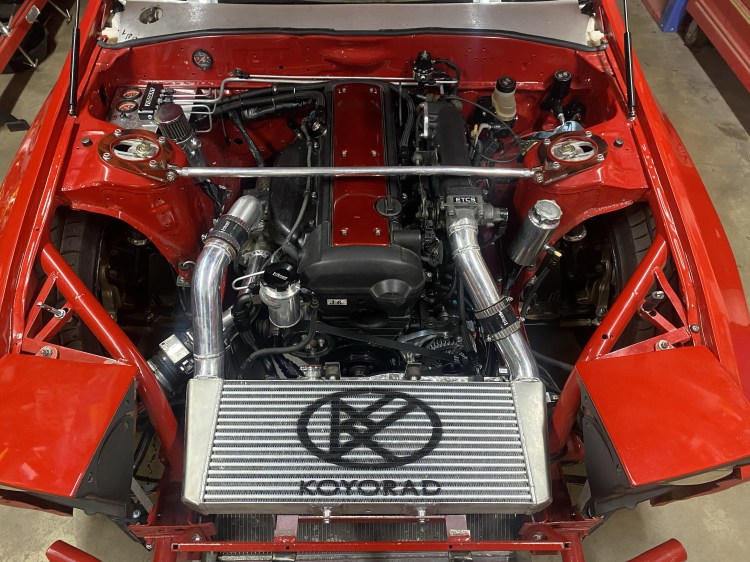
Step 69: Do what the heart desires and push the easy button, hello JZX100 1JZGTE VVTI. My friends were big encouragers of this for a good reason. I used to have a 1JZ in my rock crawler 4runner and my S13drift car. (The engine was magical and was super cheap back then. $1,000USD)
Special thanks to my friends that helped along the way; Jeff, Ian, Nick, Max, Dakota, Codi, Brent, etc. I couldn’t have done this without you guys.
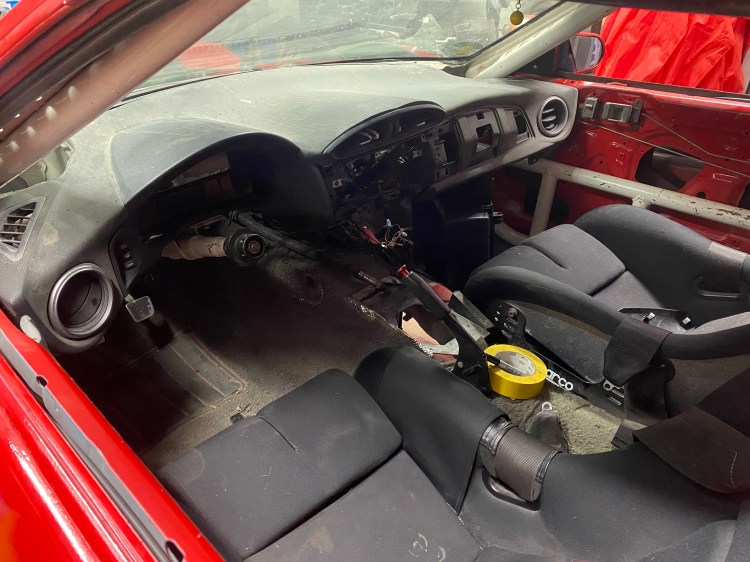
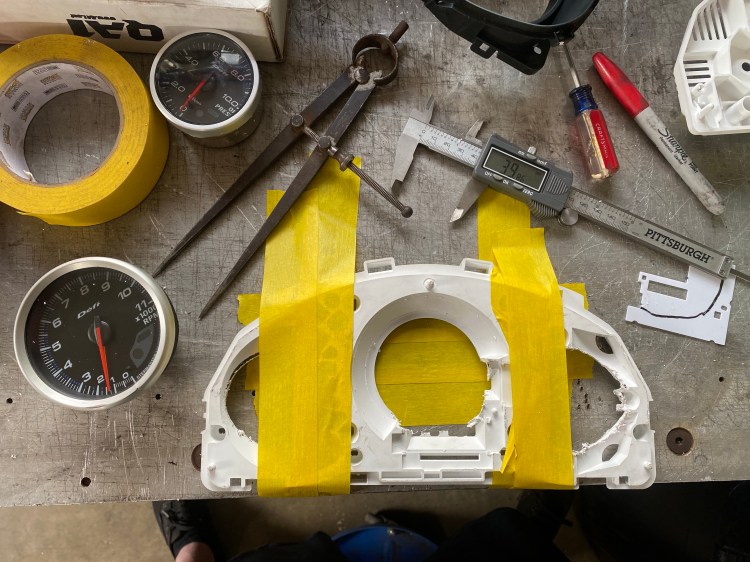
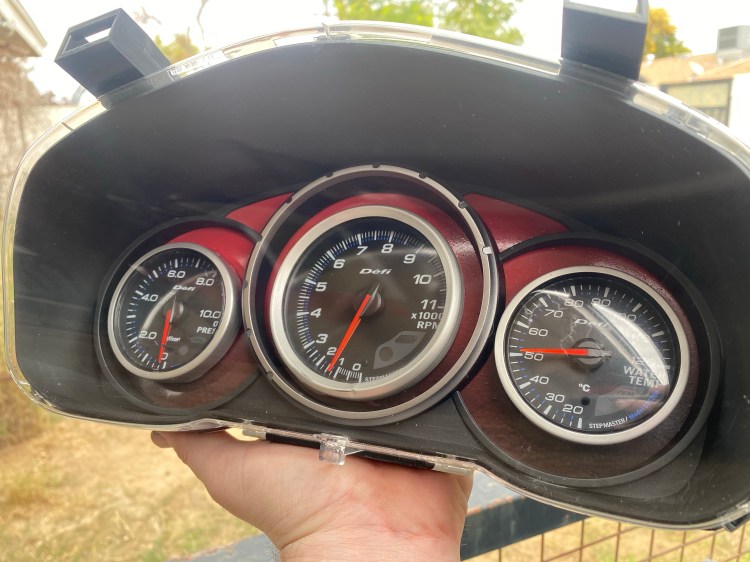
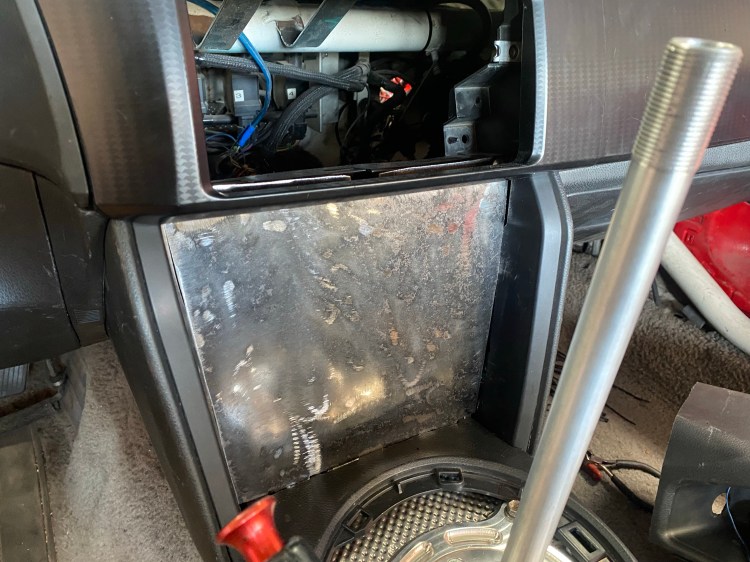
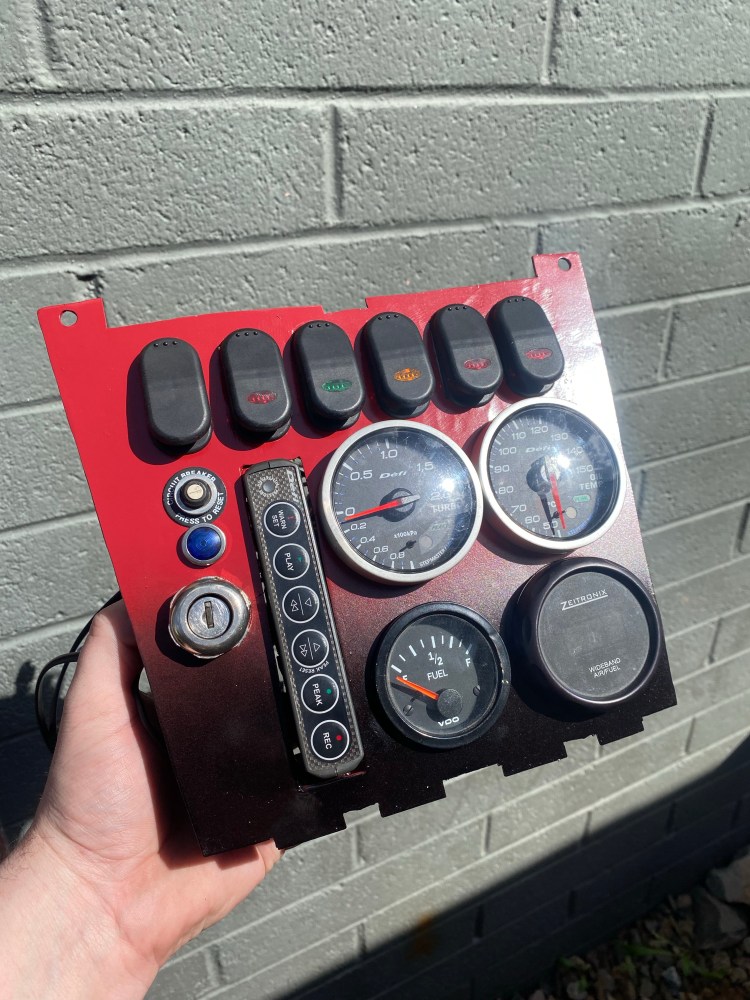
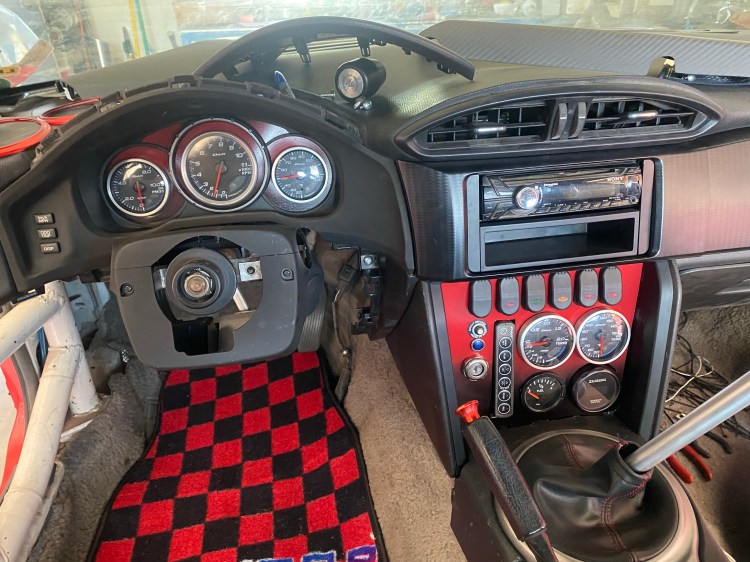
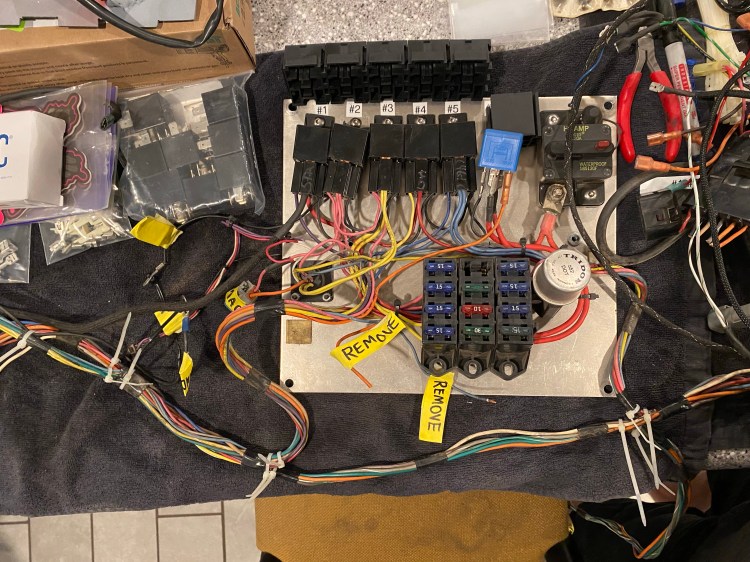
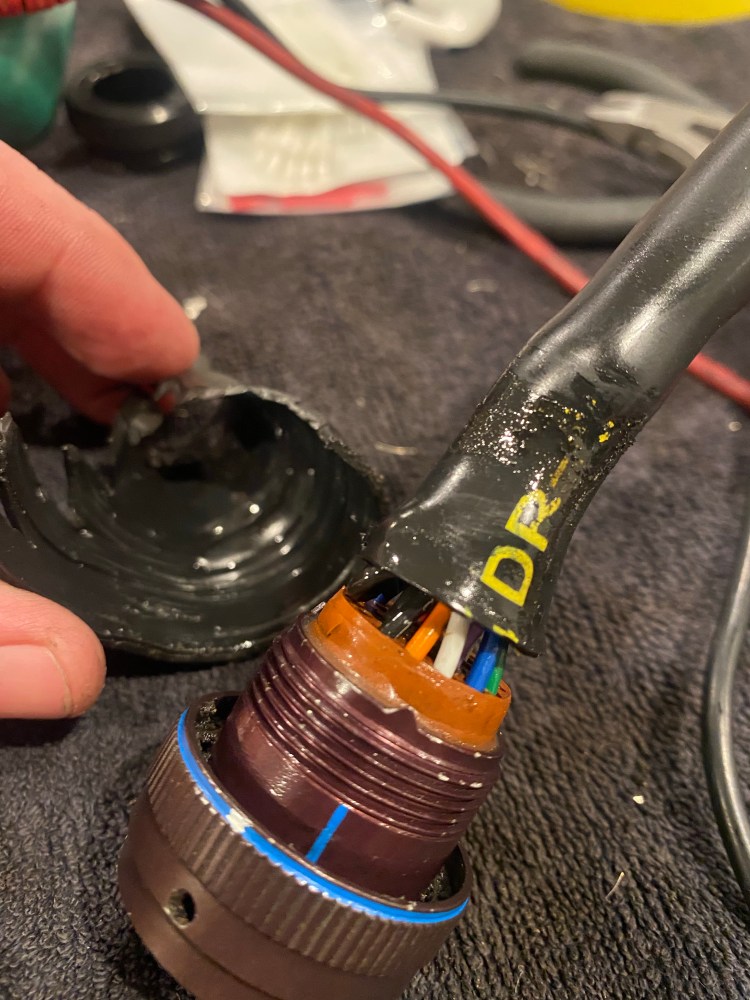
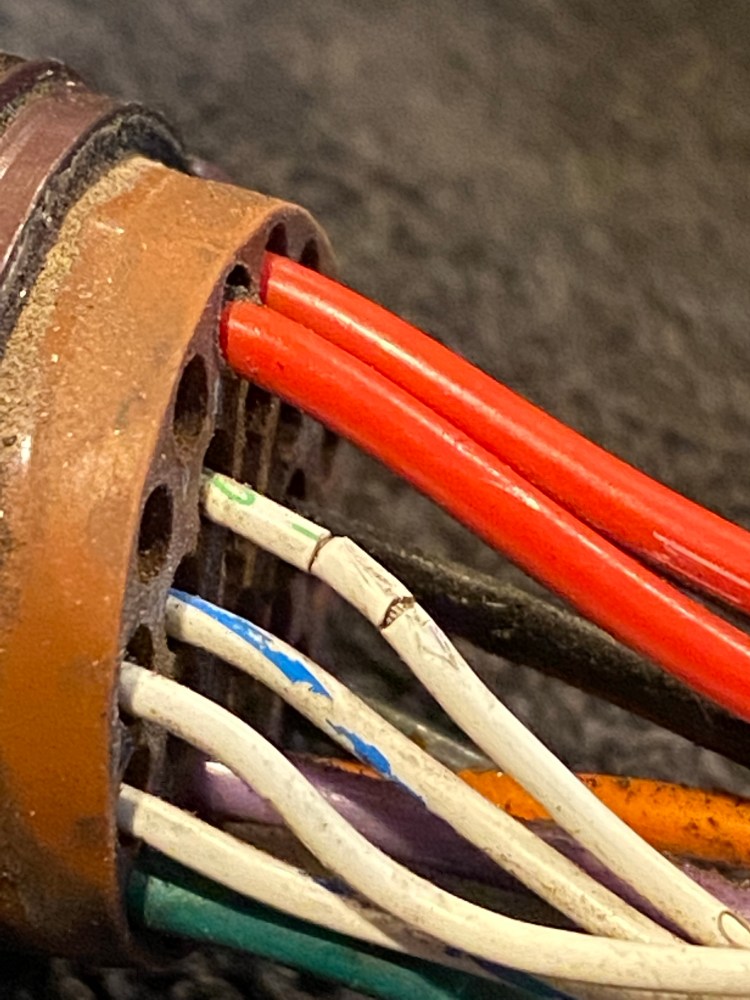
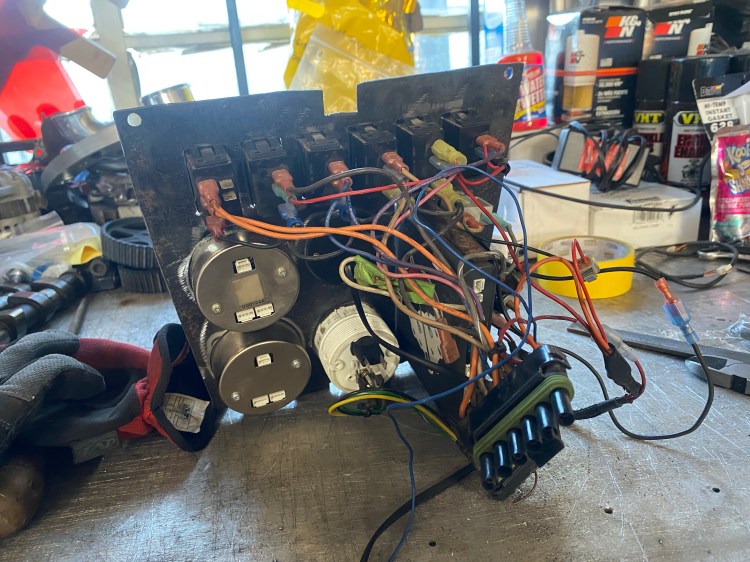
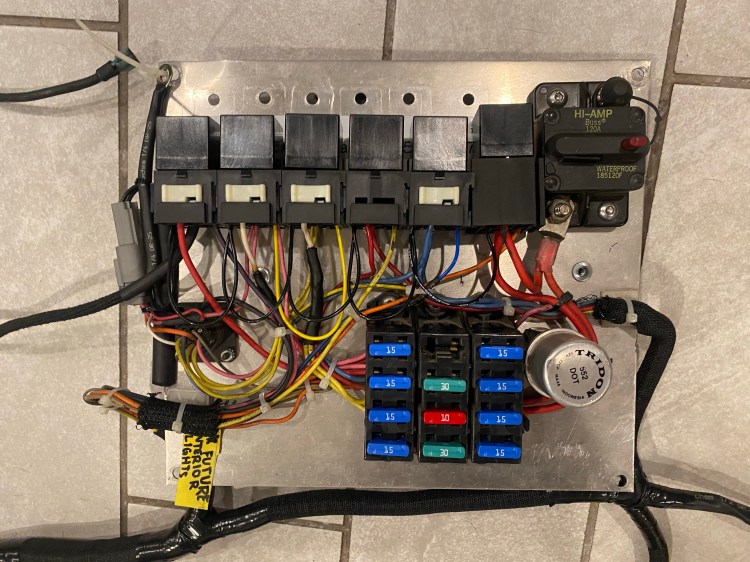
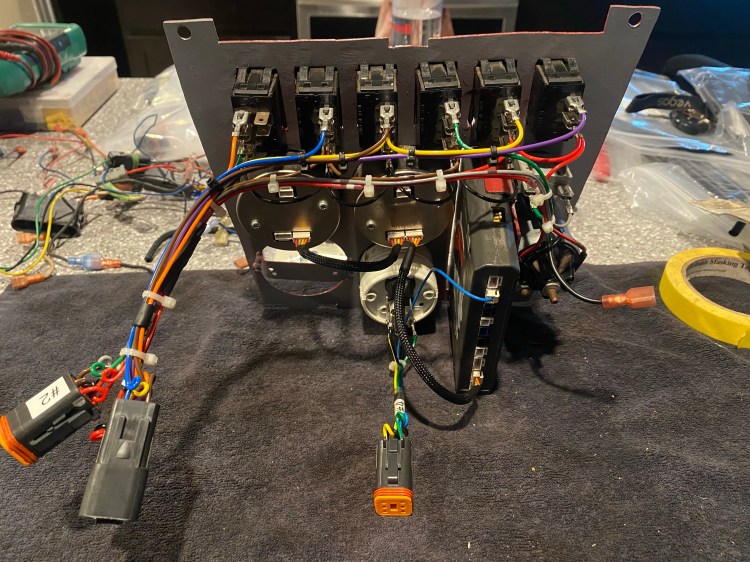
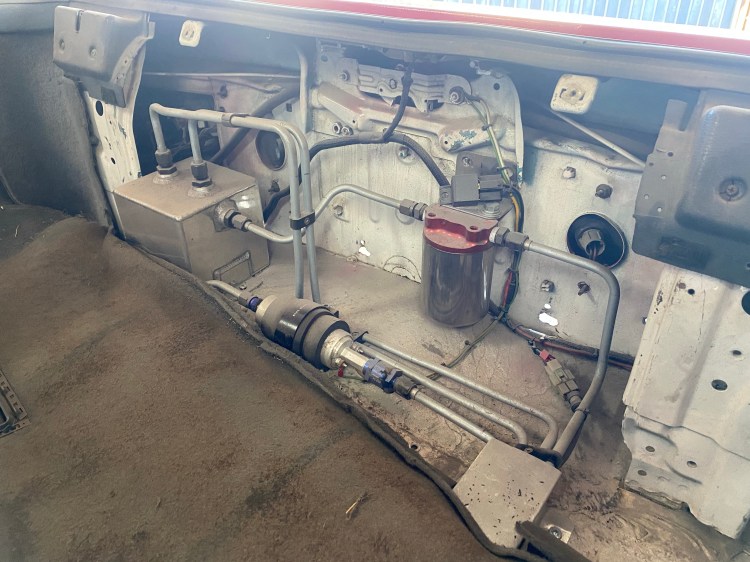
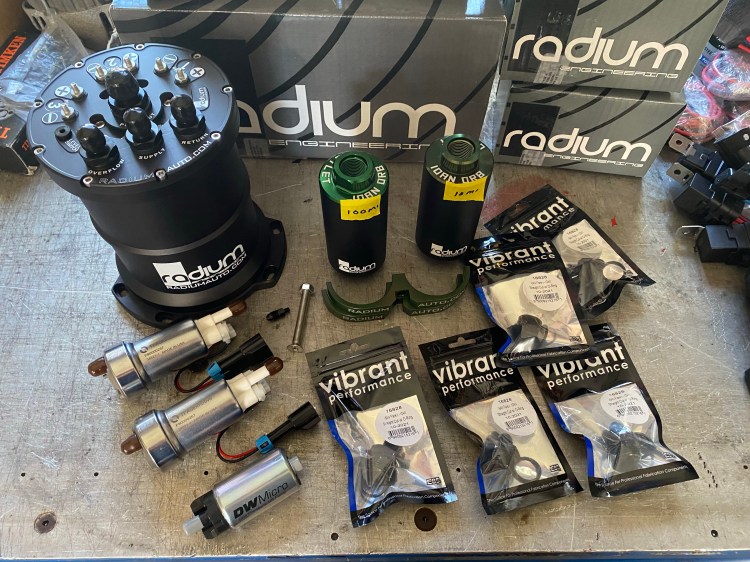
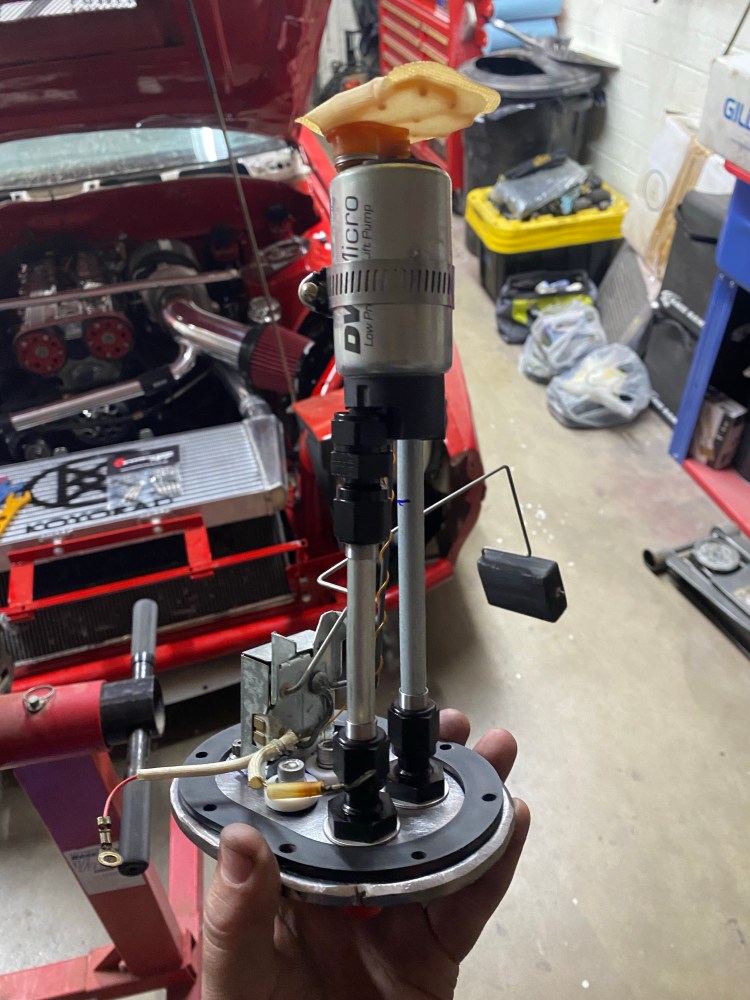
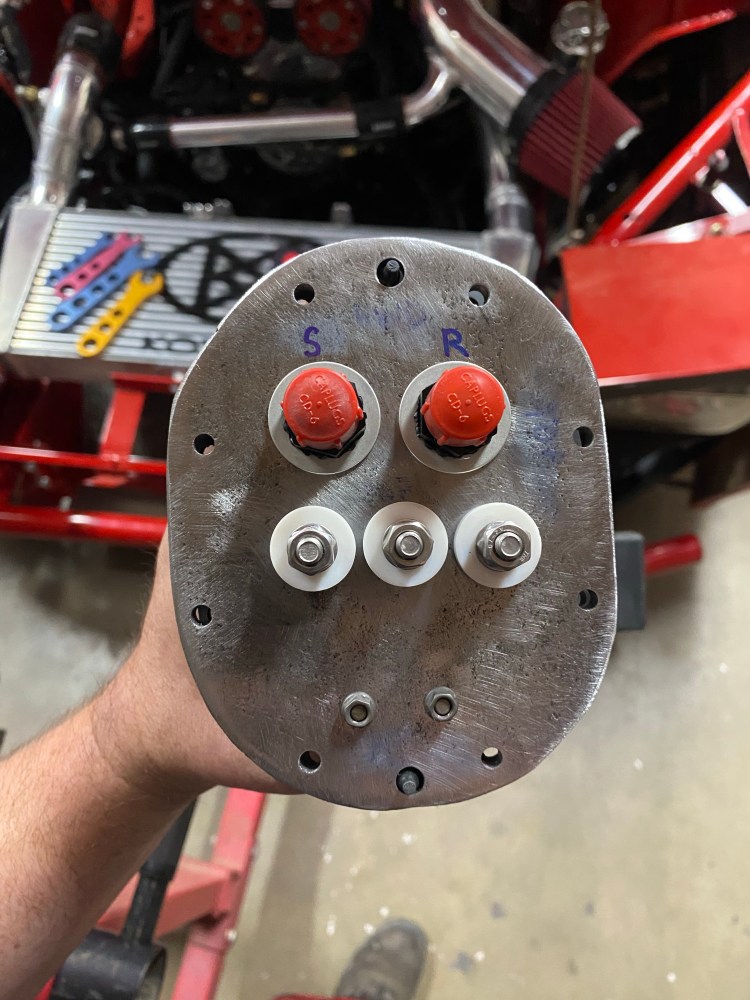
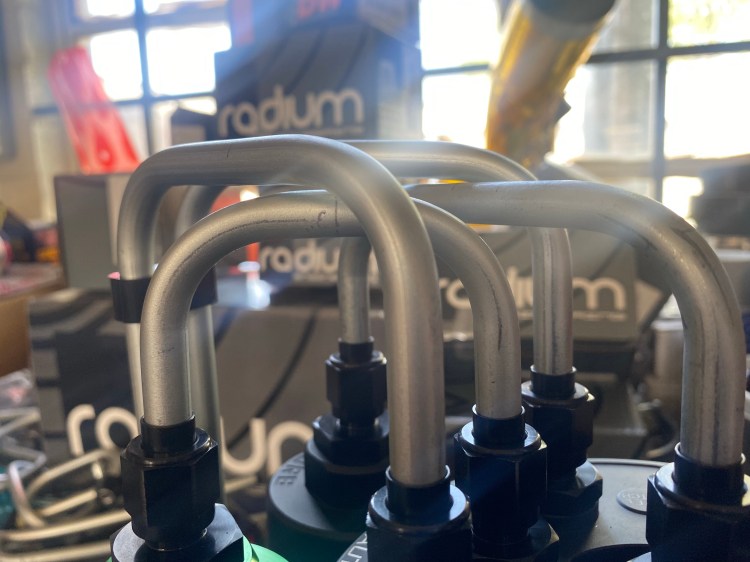
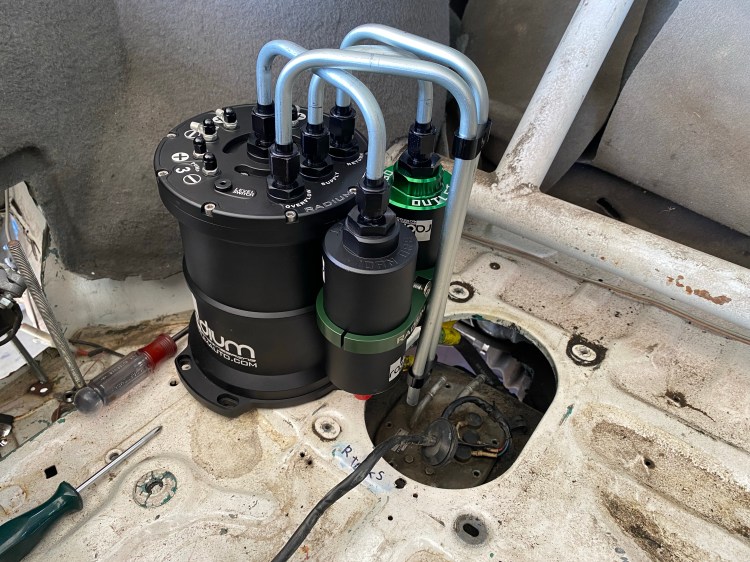
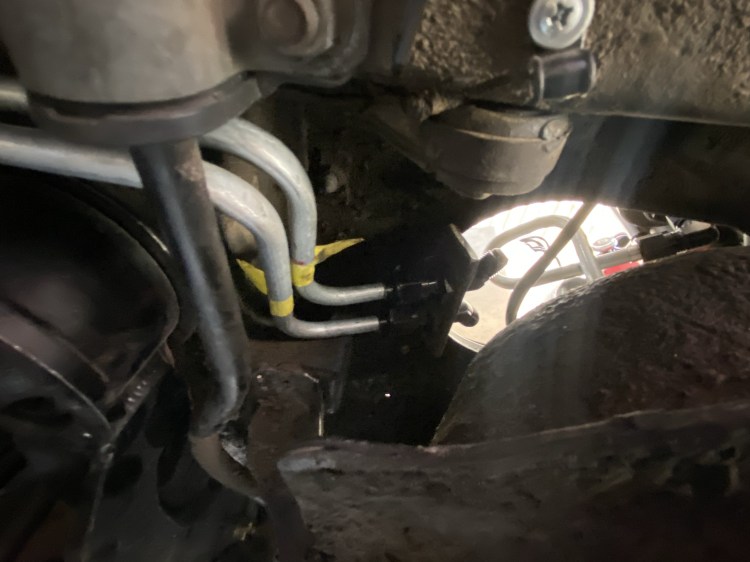
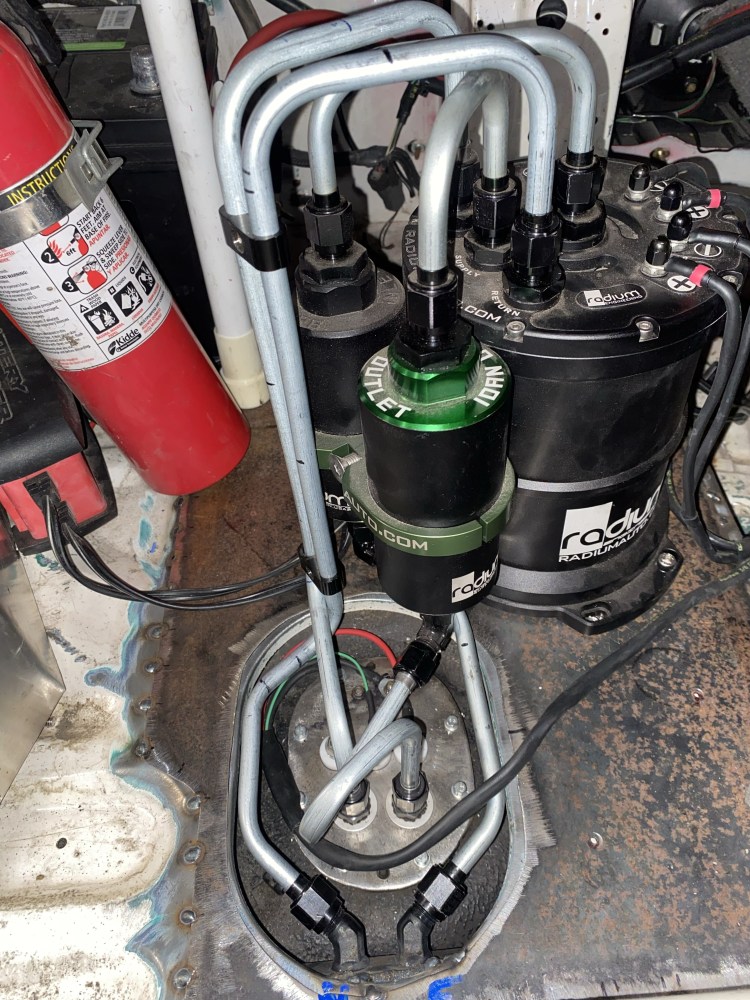
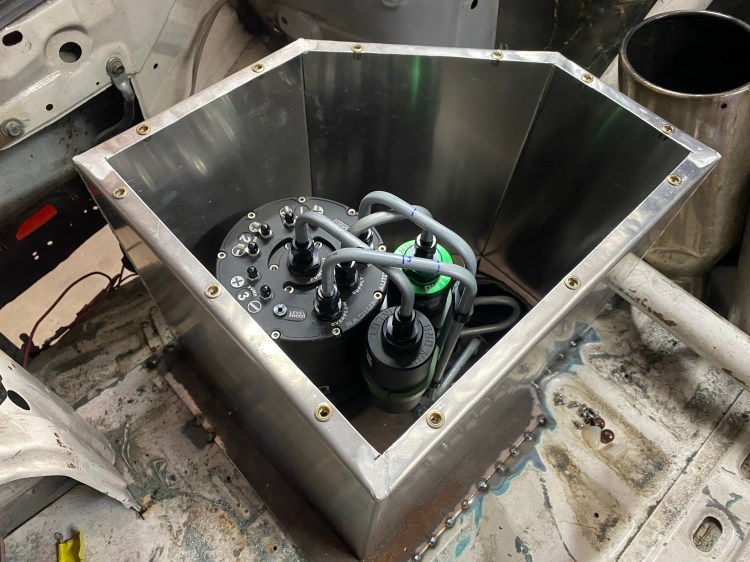
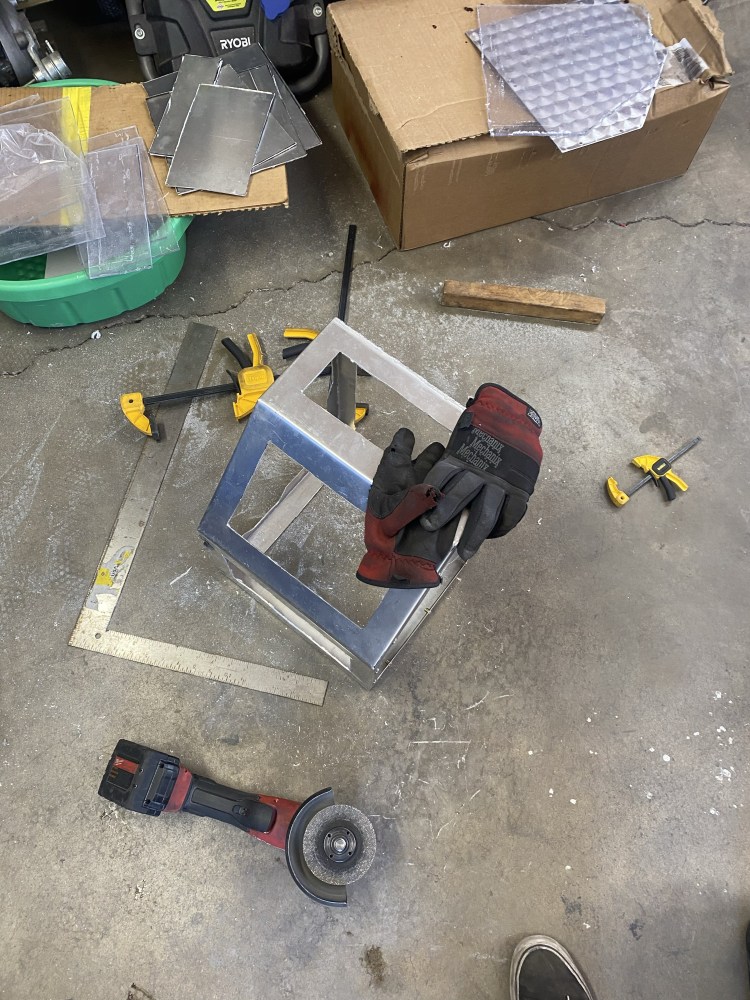
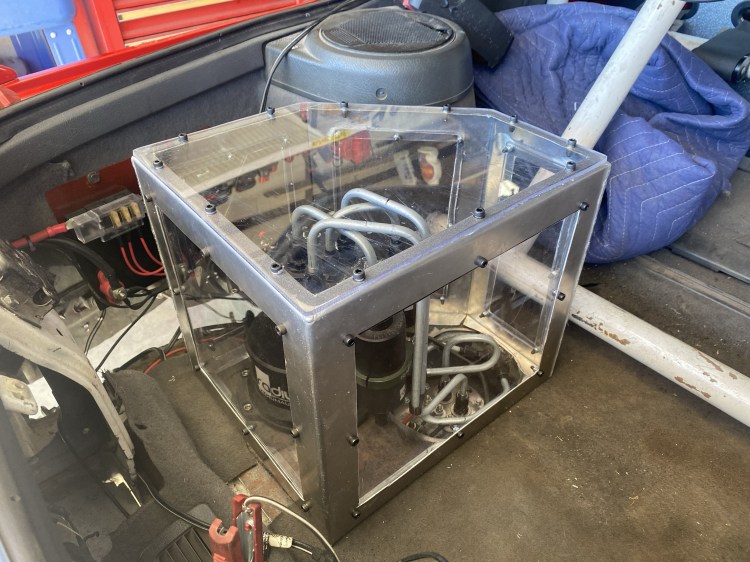
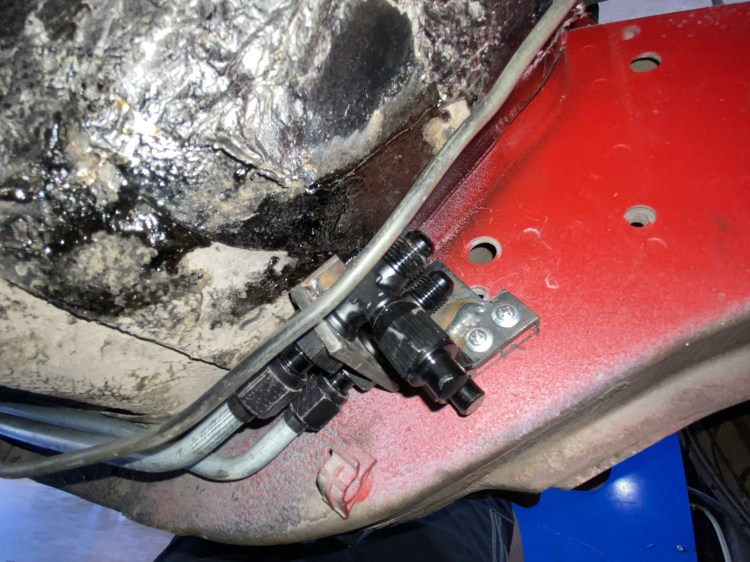
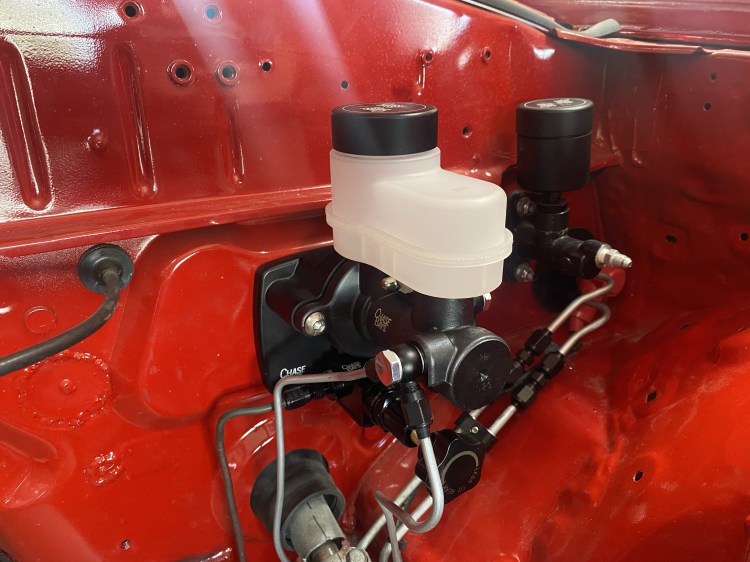
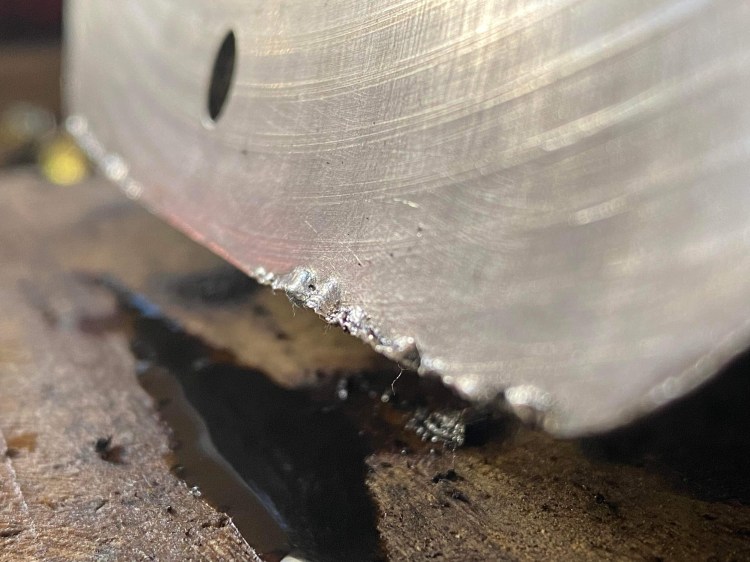
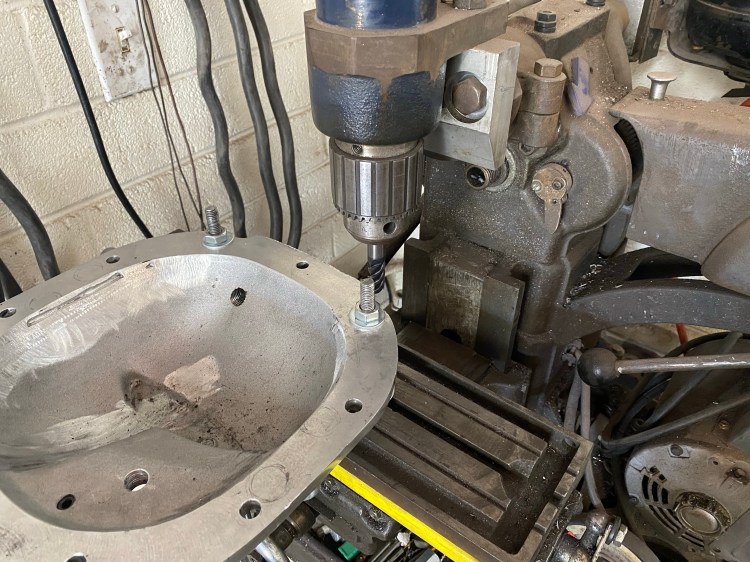
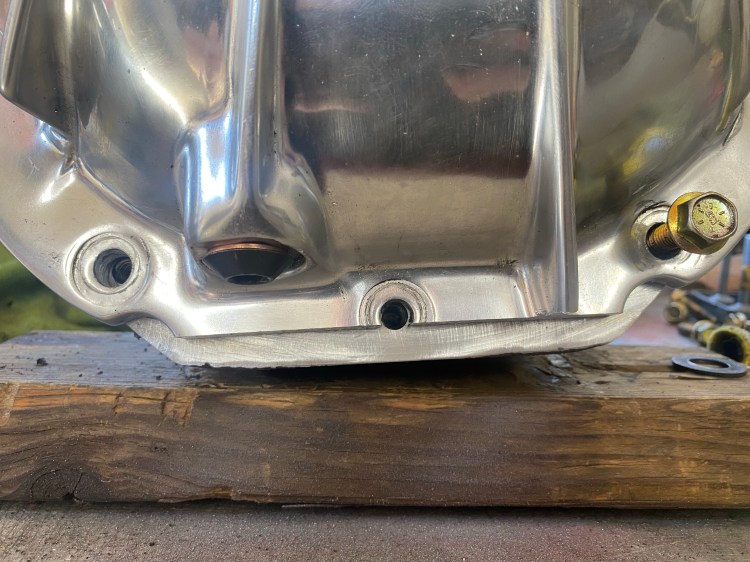
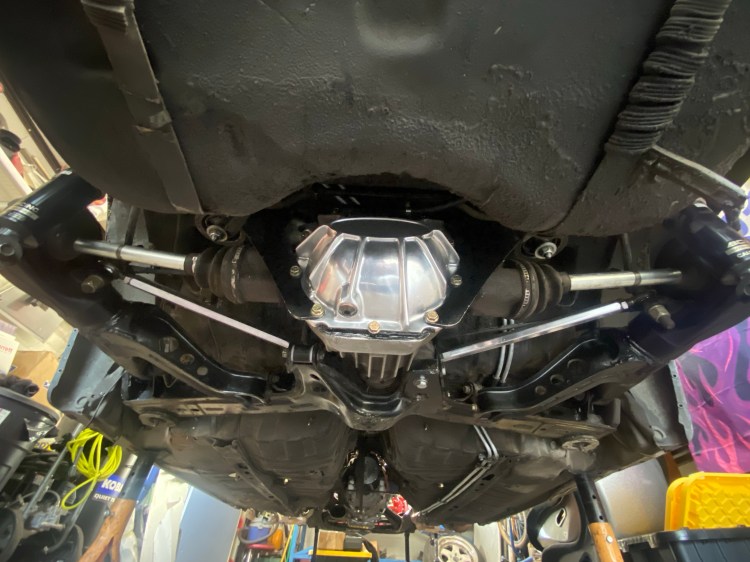
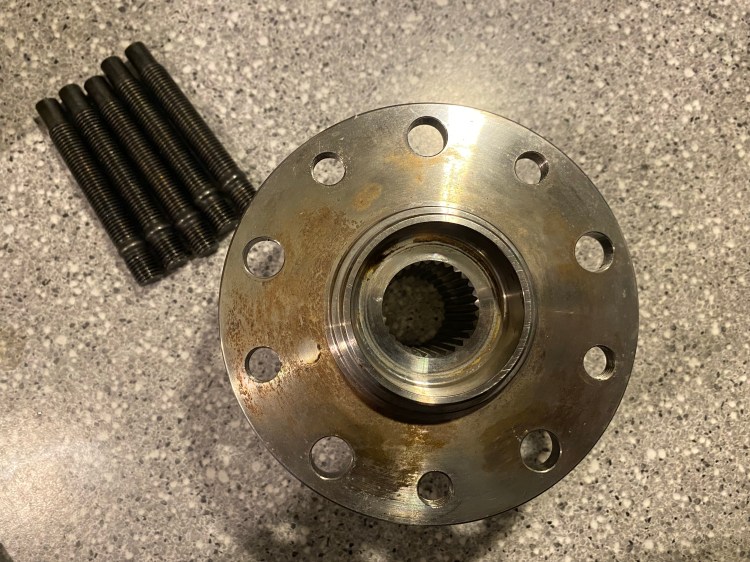
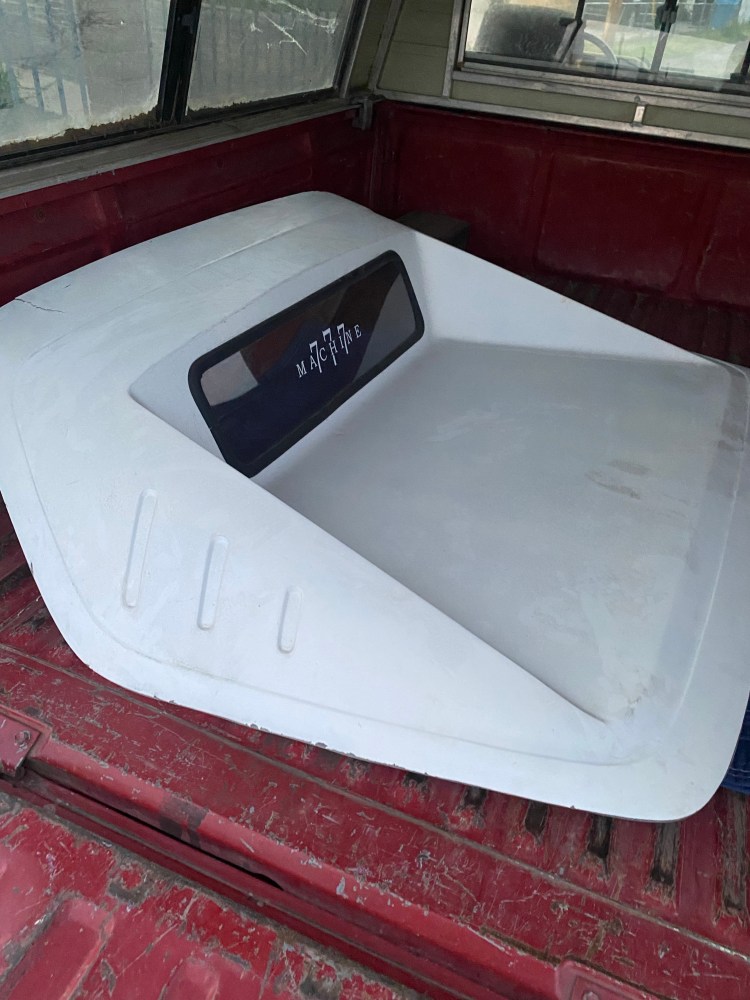
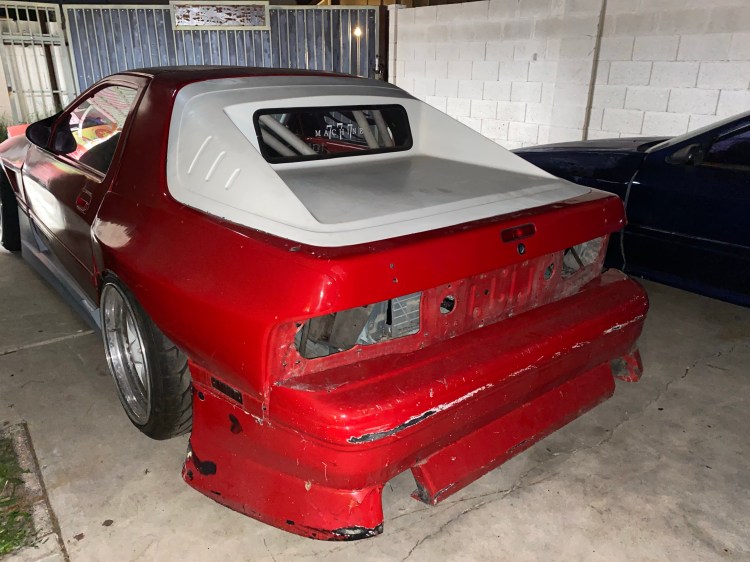
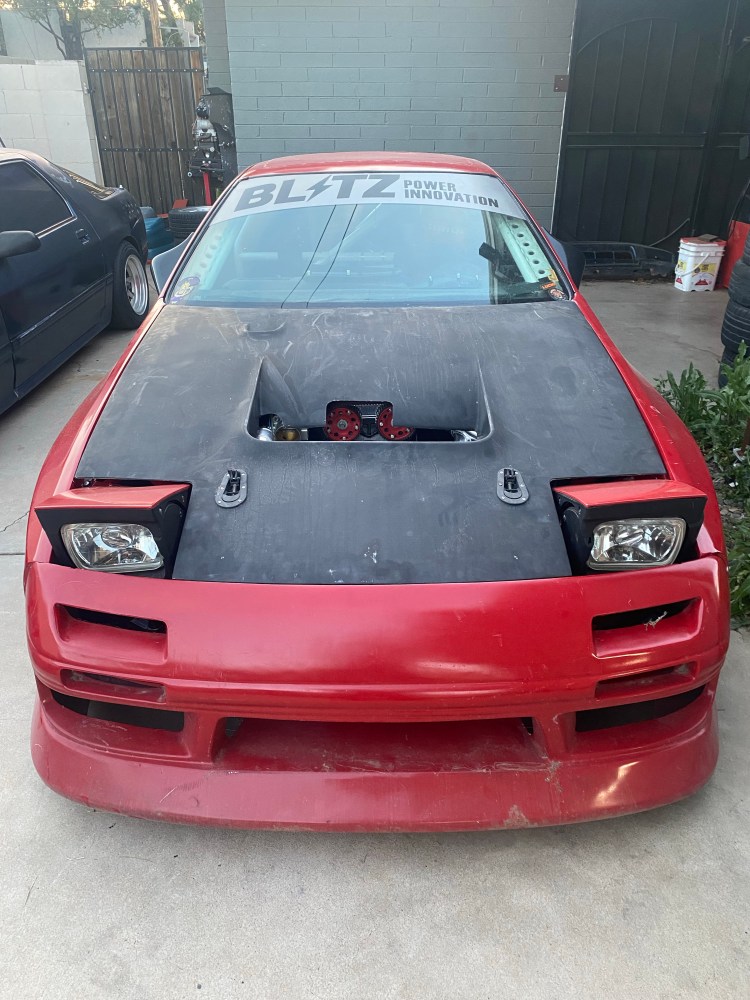
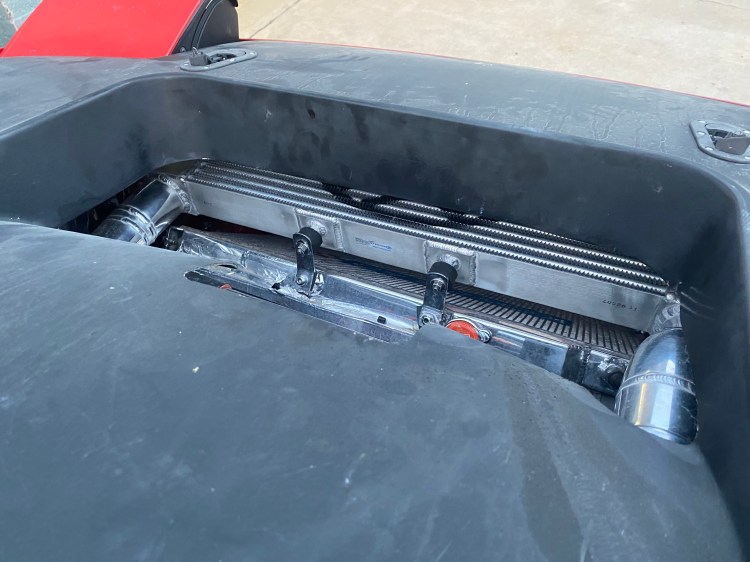
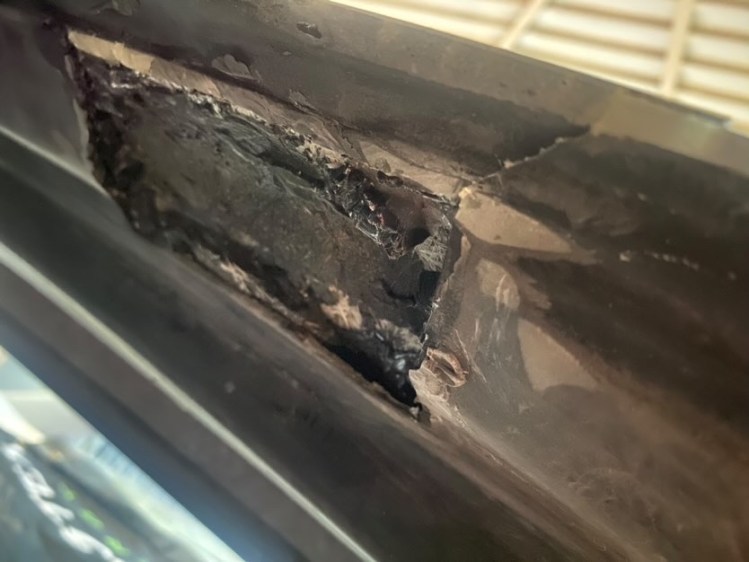
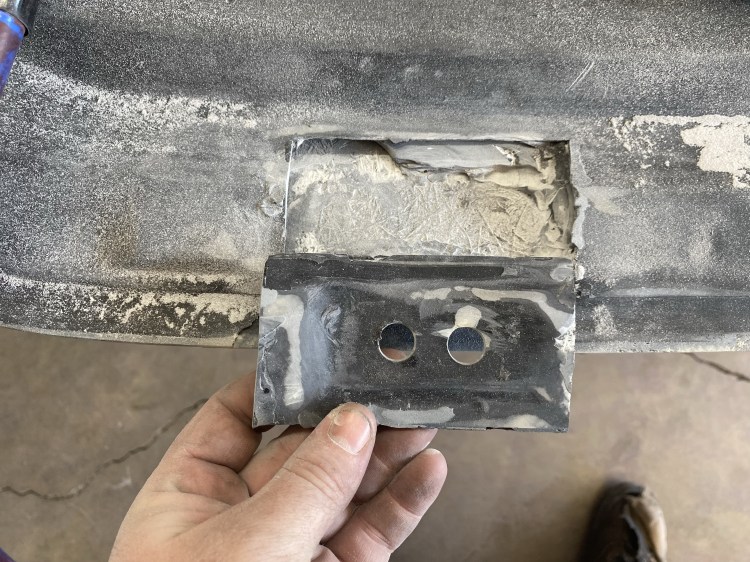
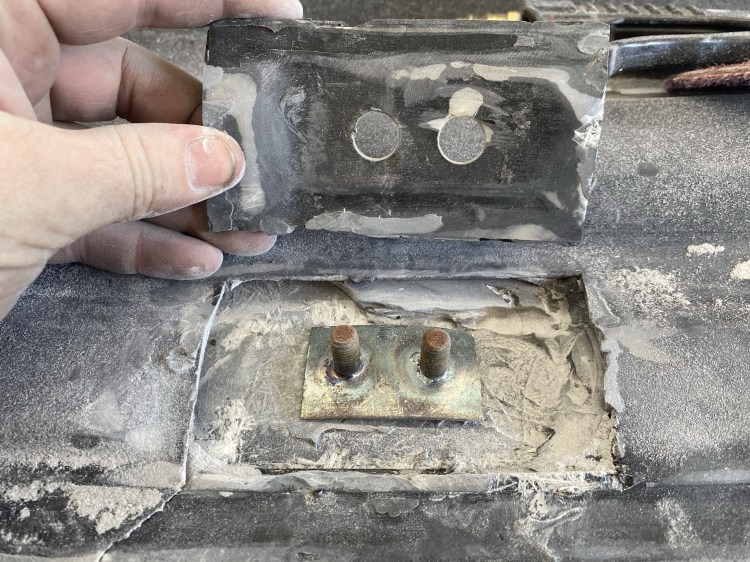
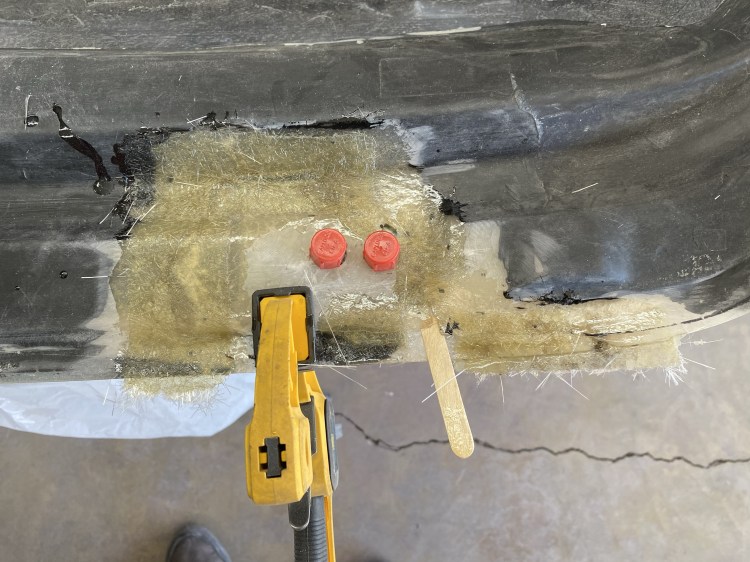
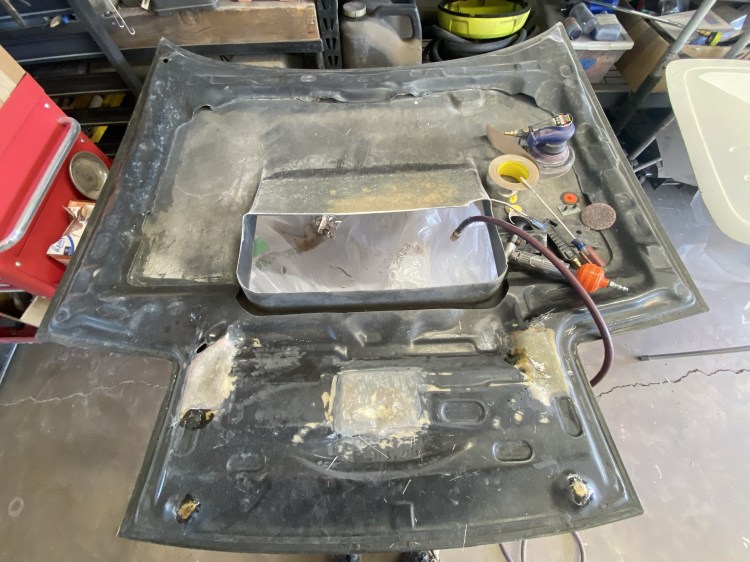
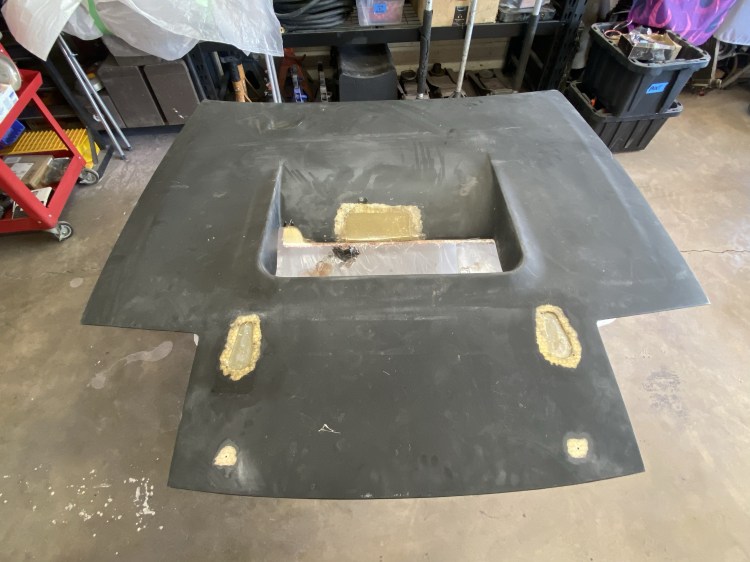
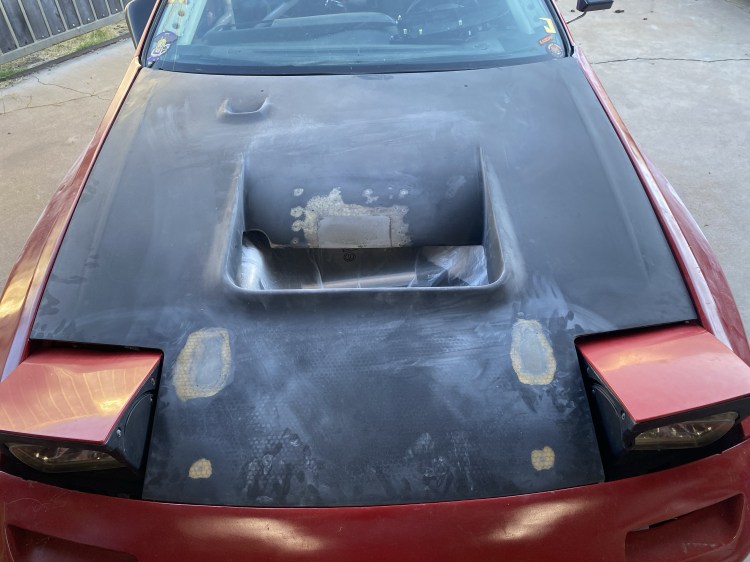
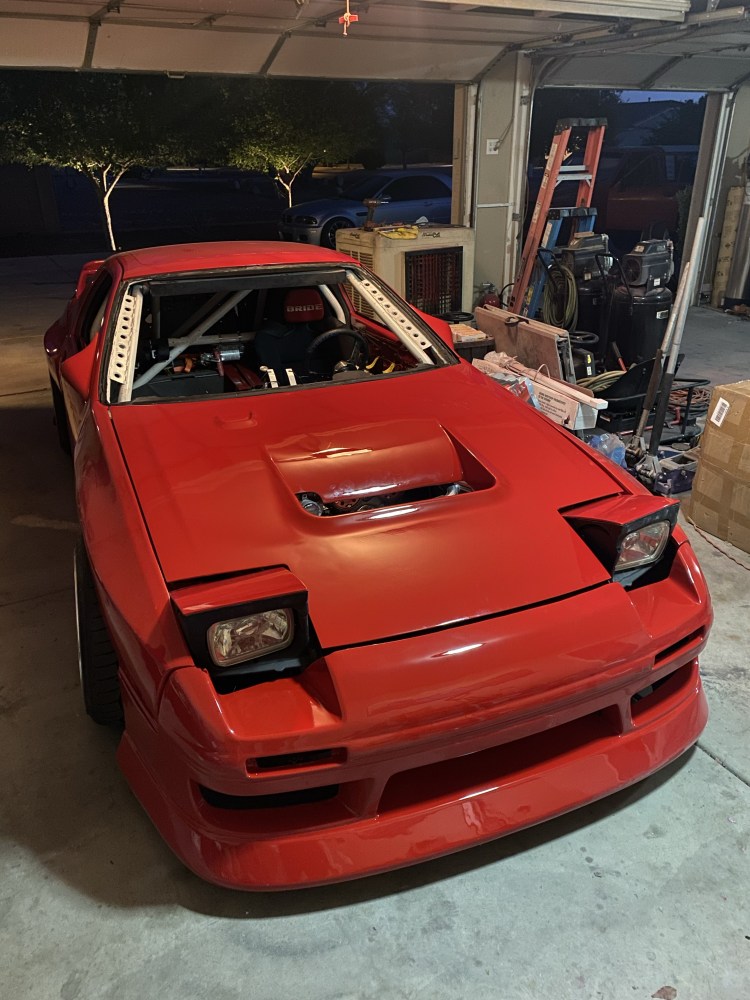
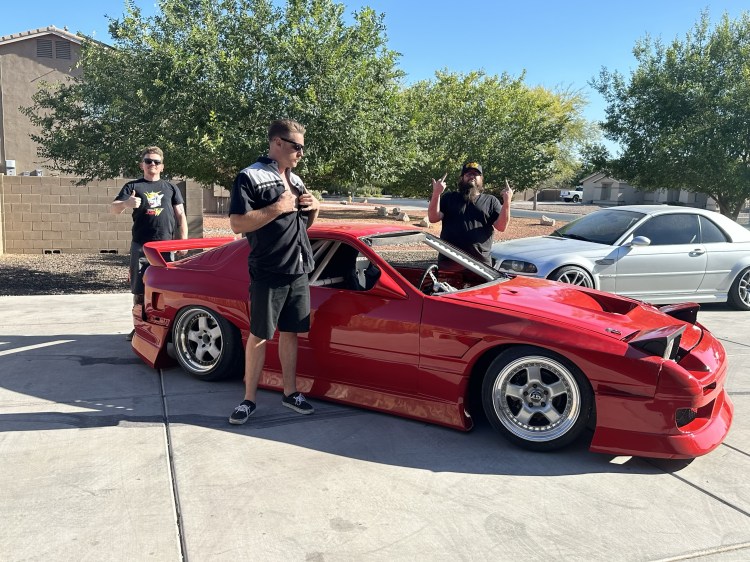
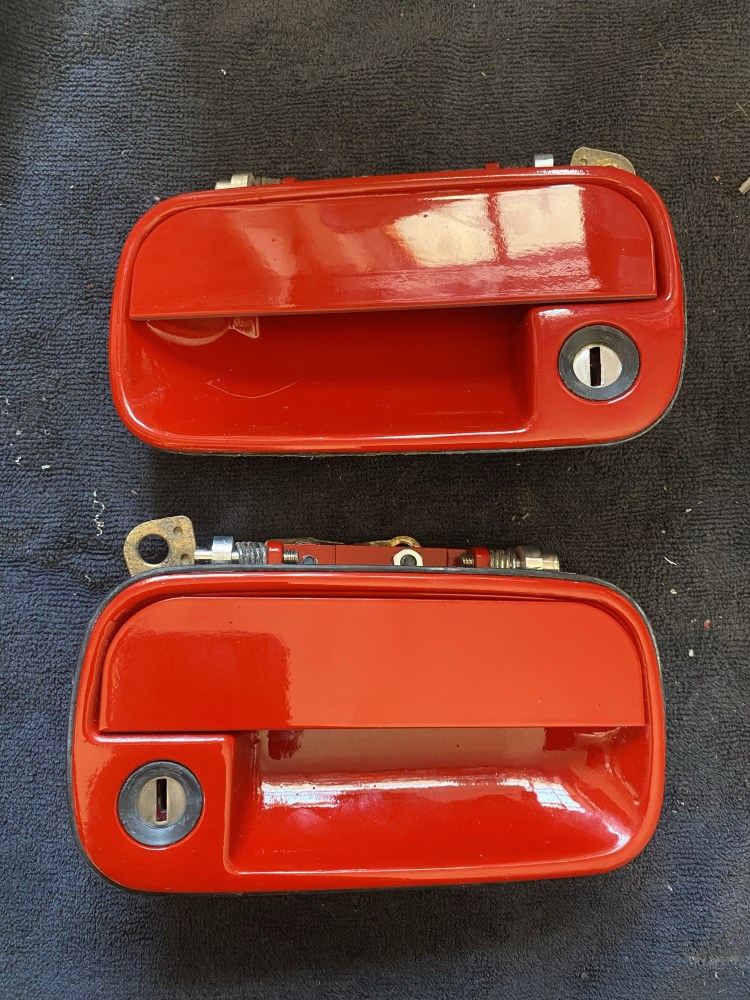
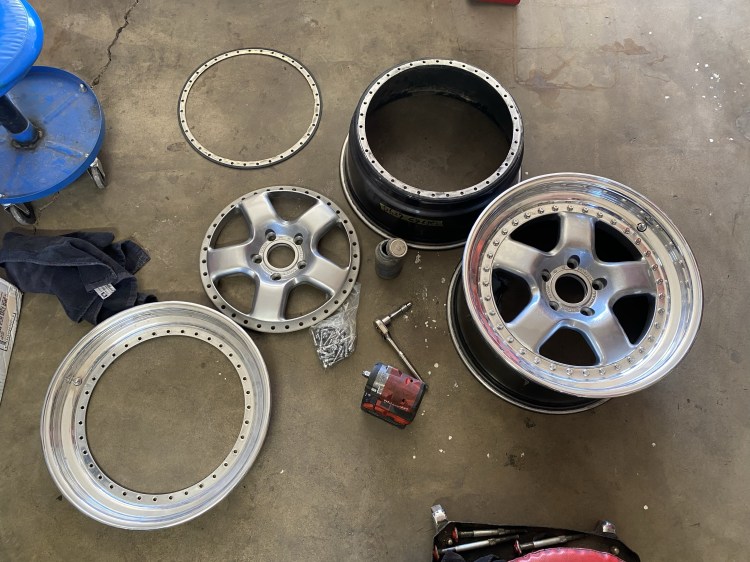
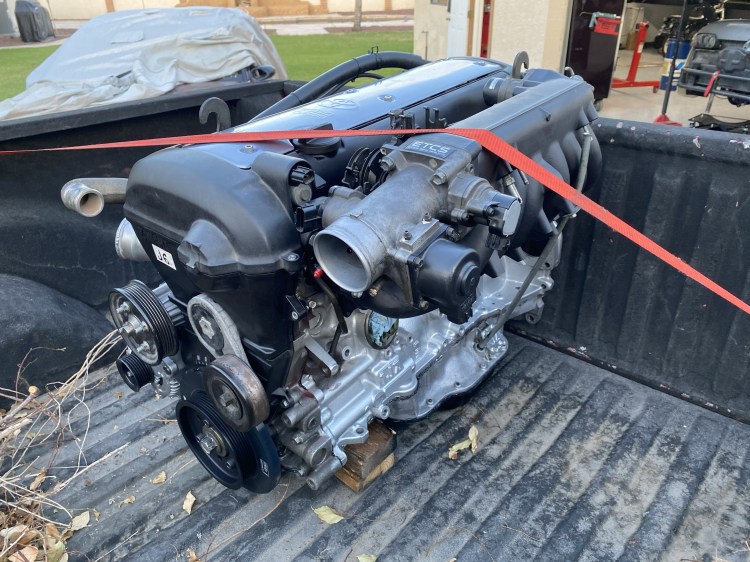
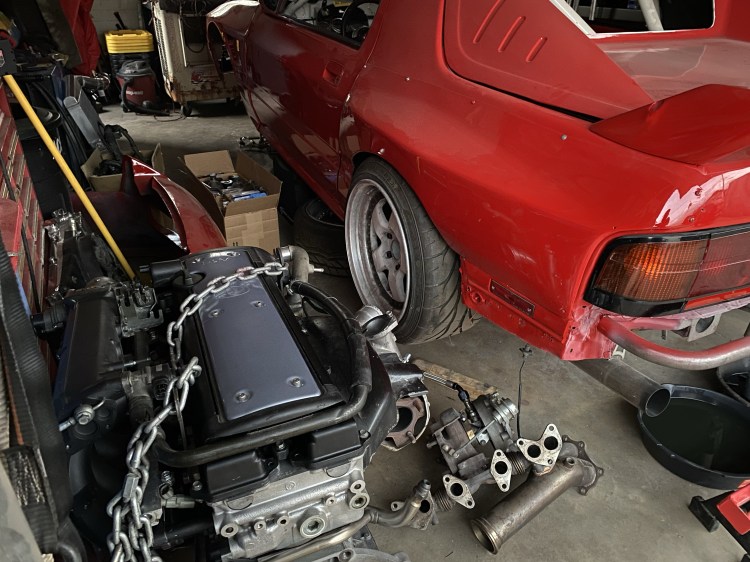
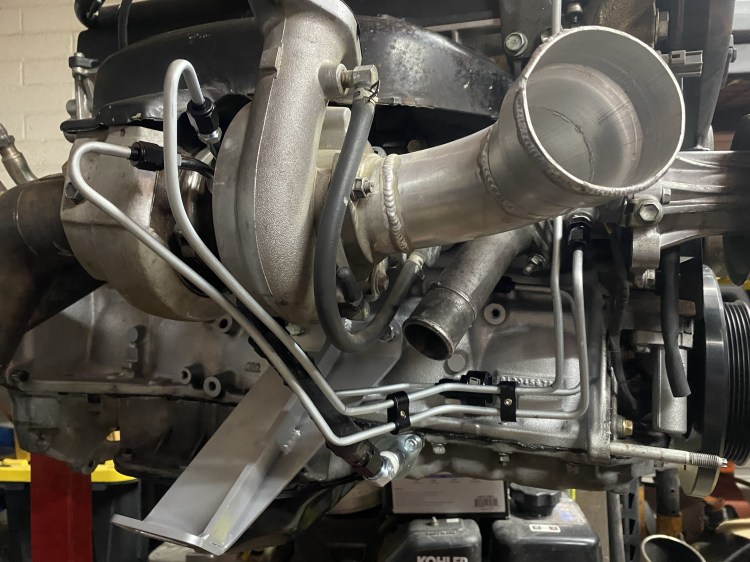
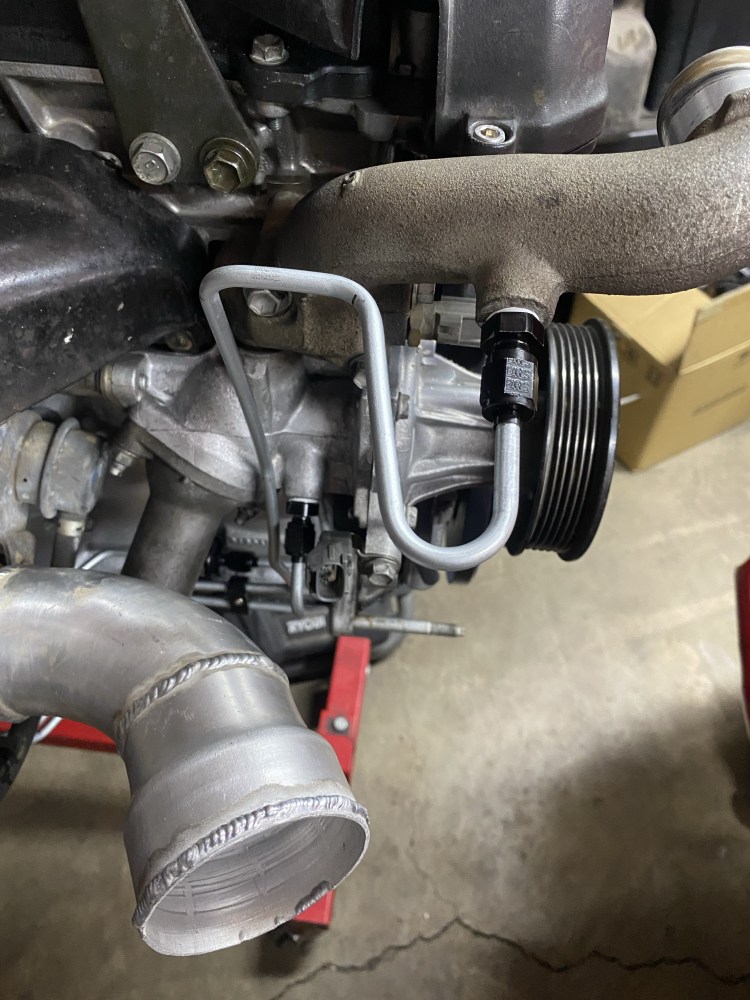
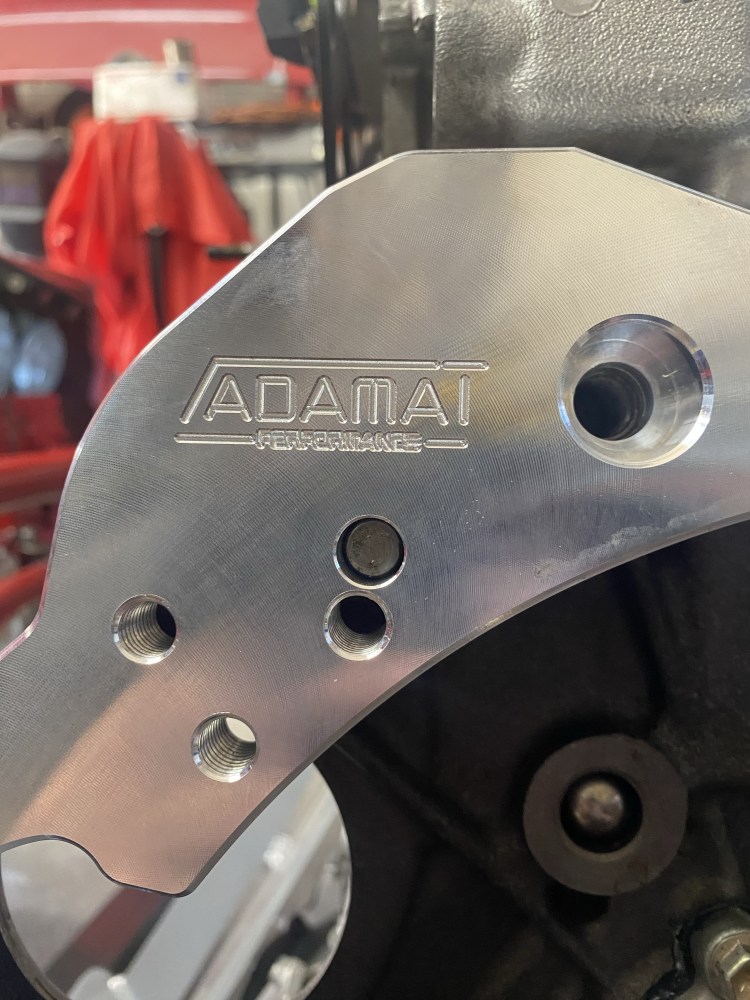
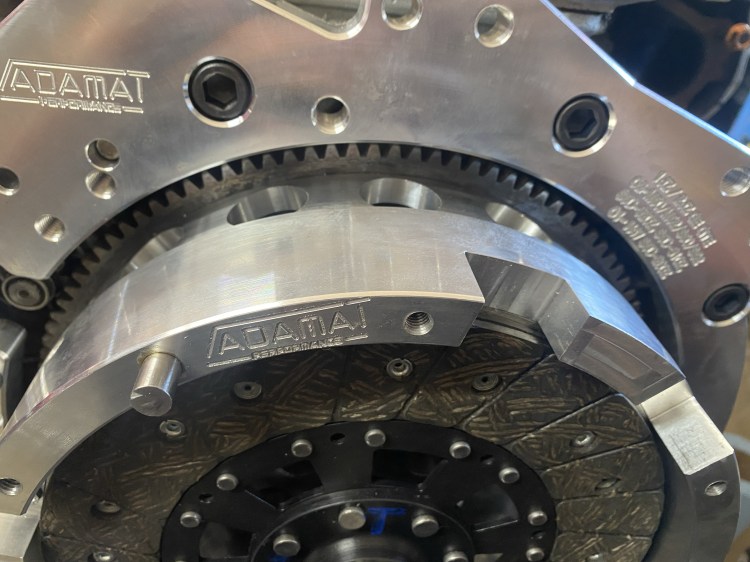
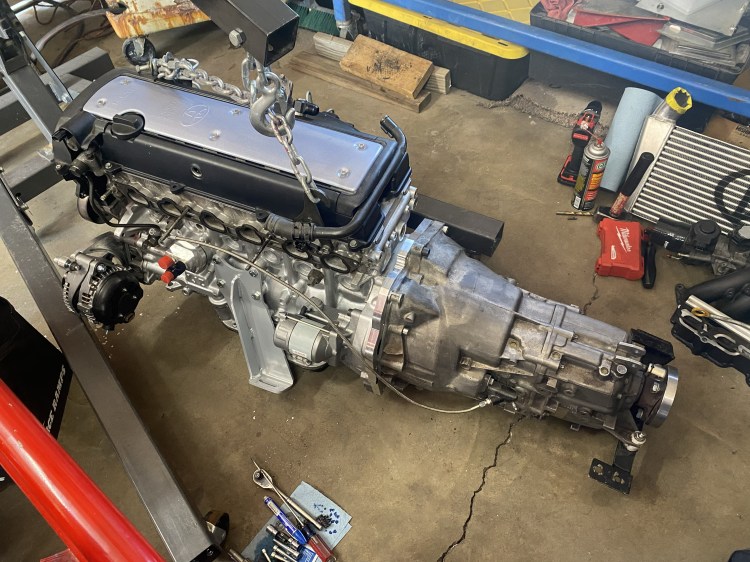
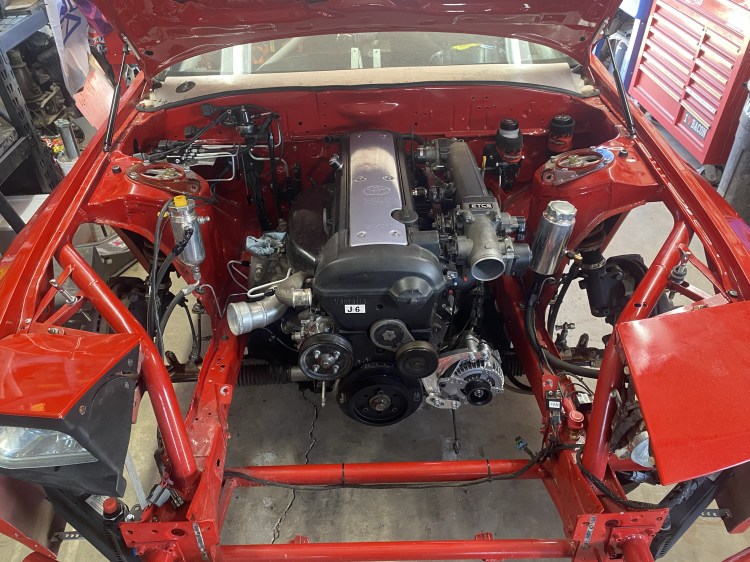
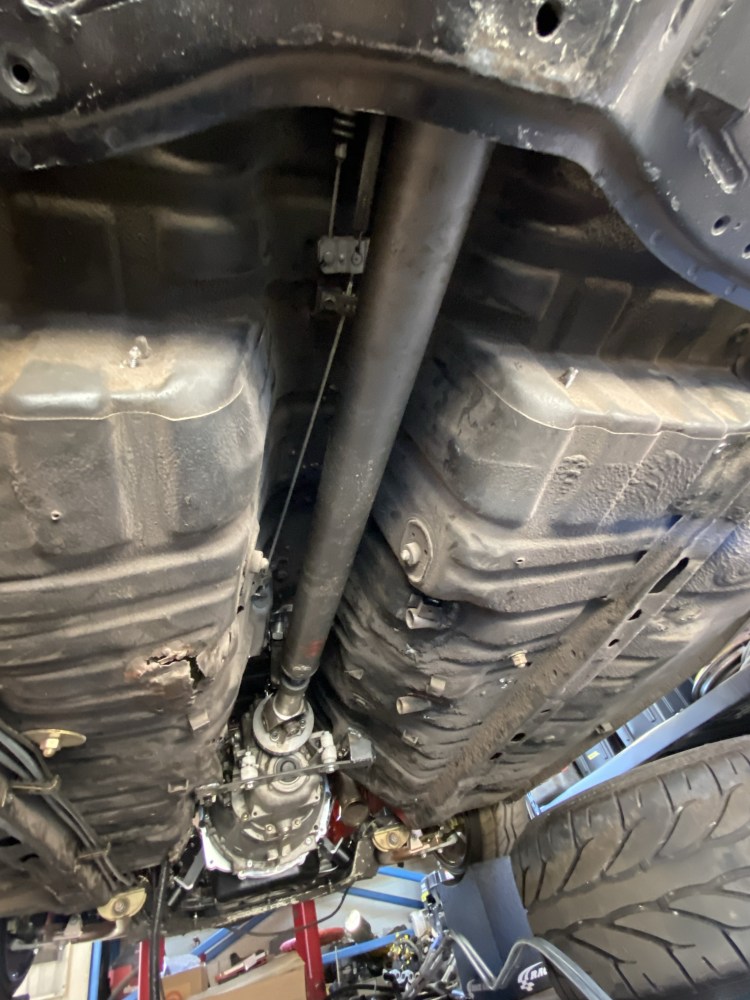
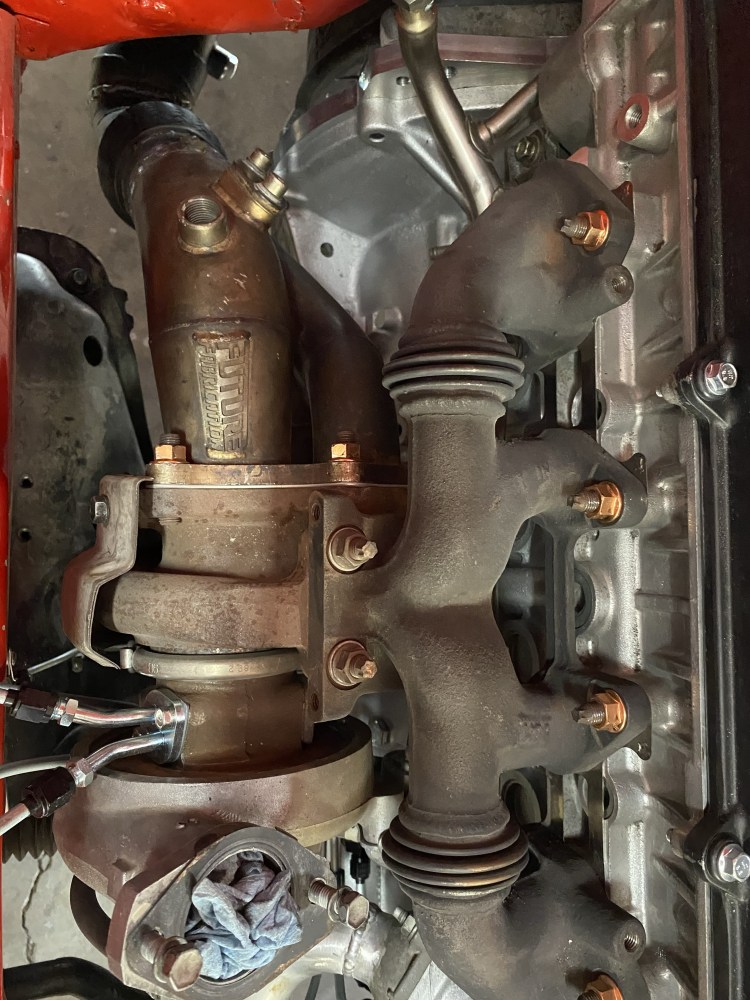
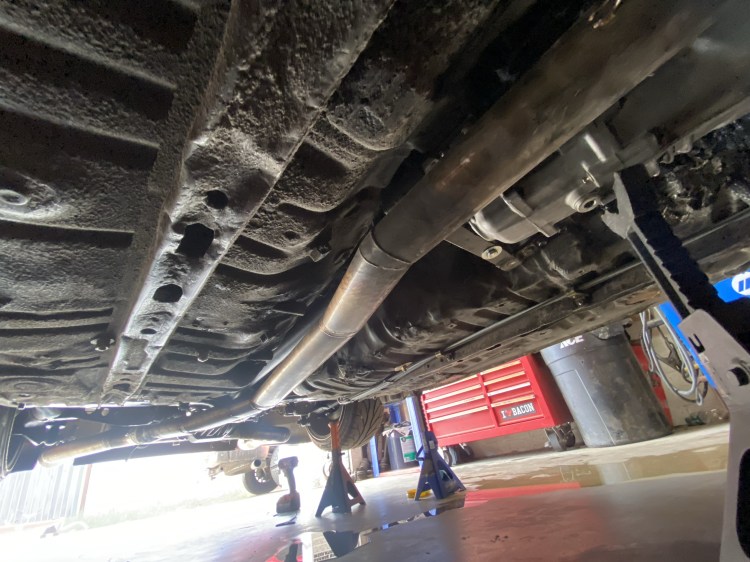
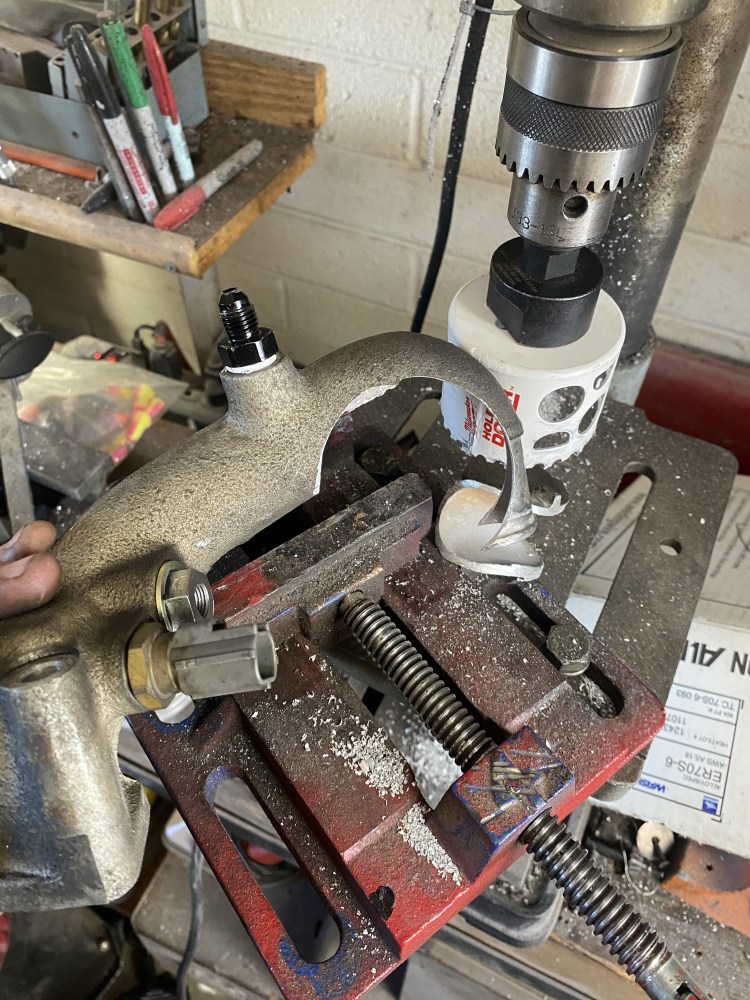
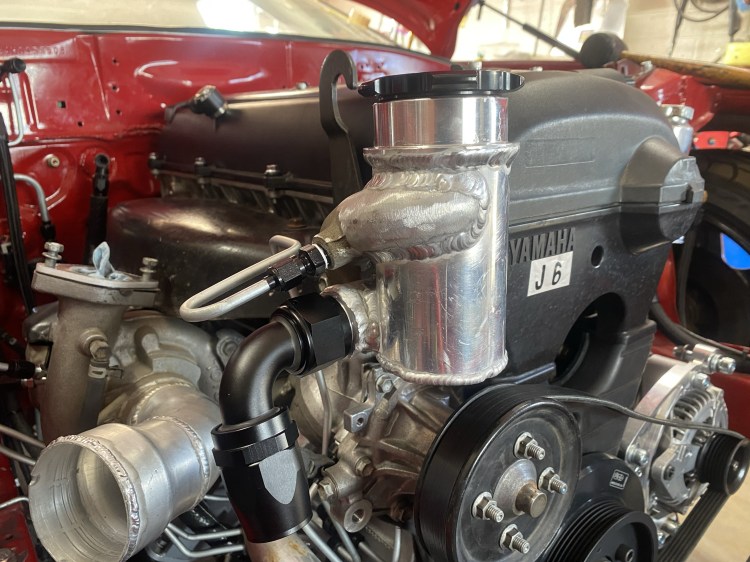
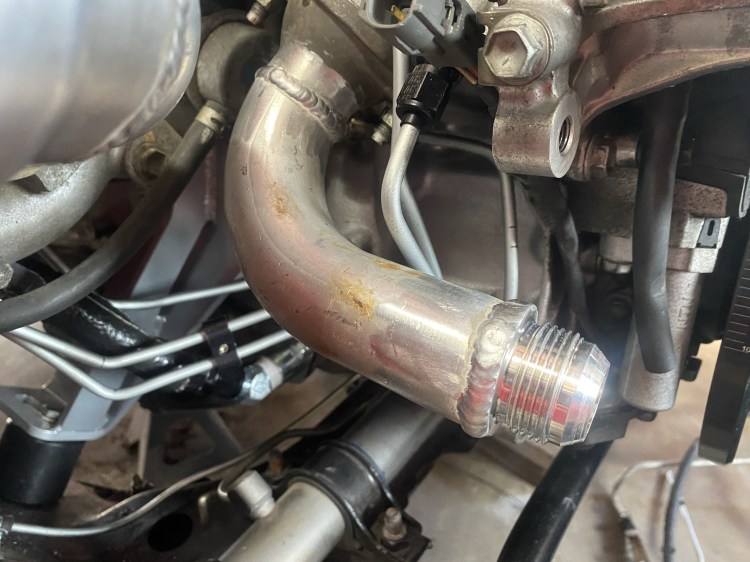
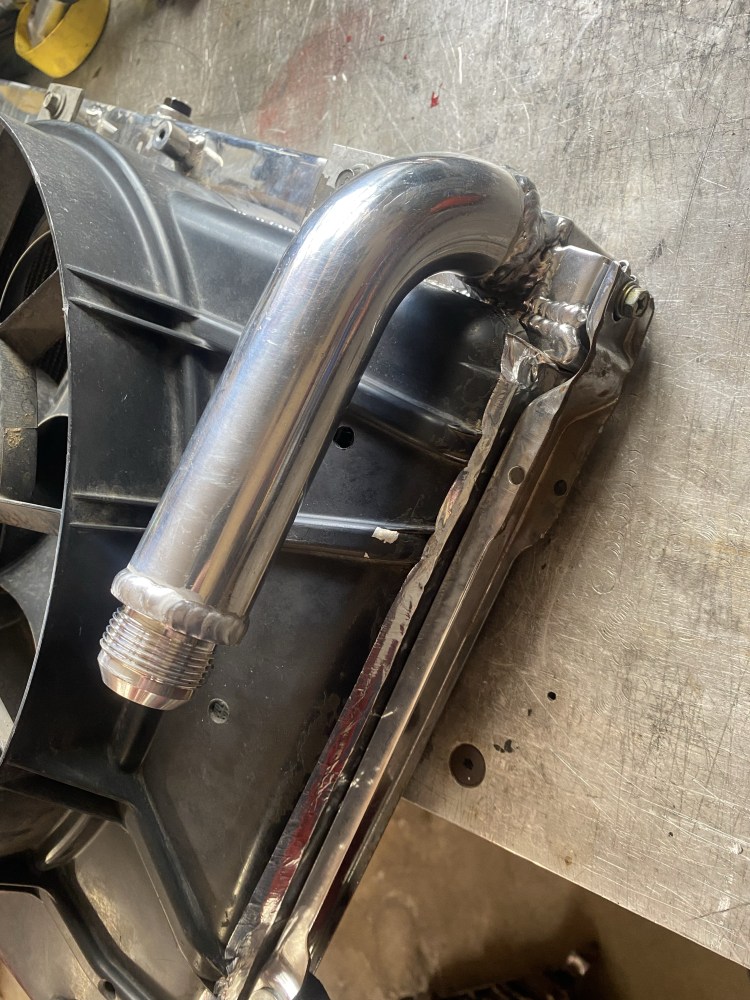
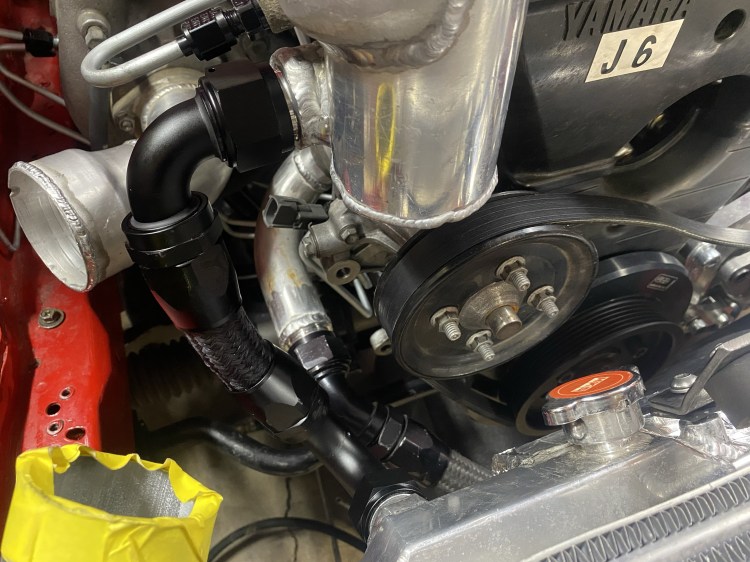
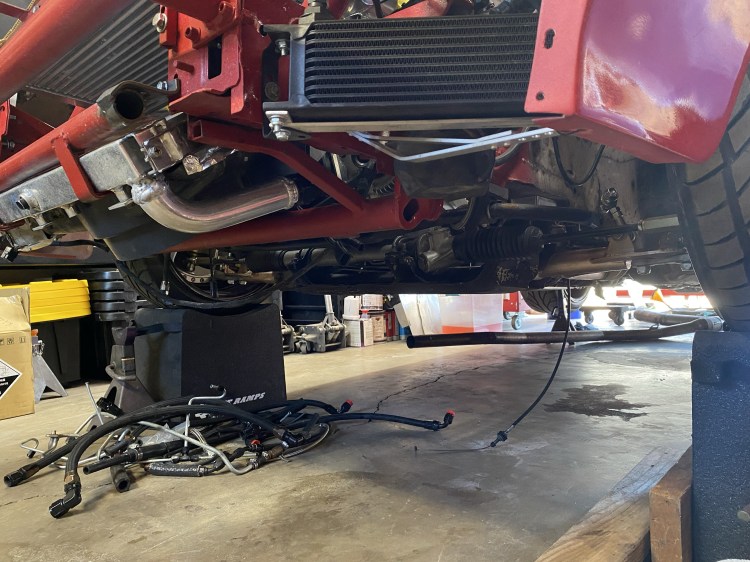
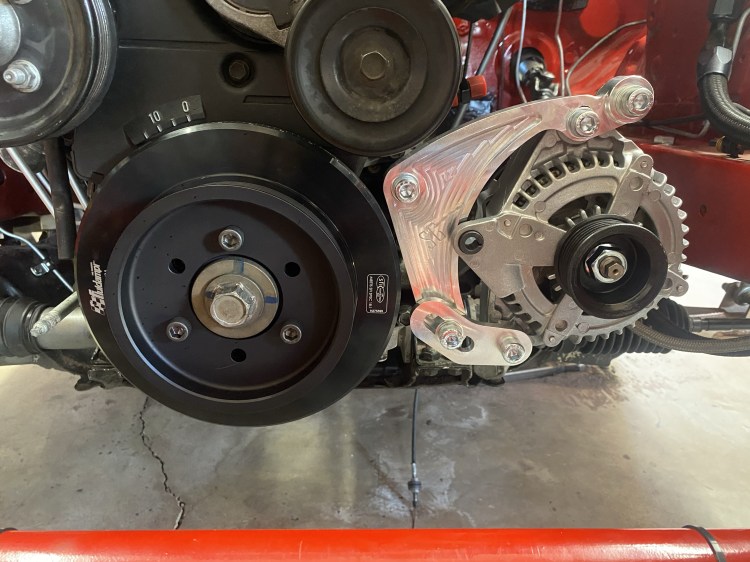
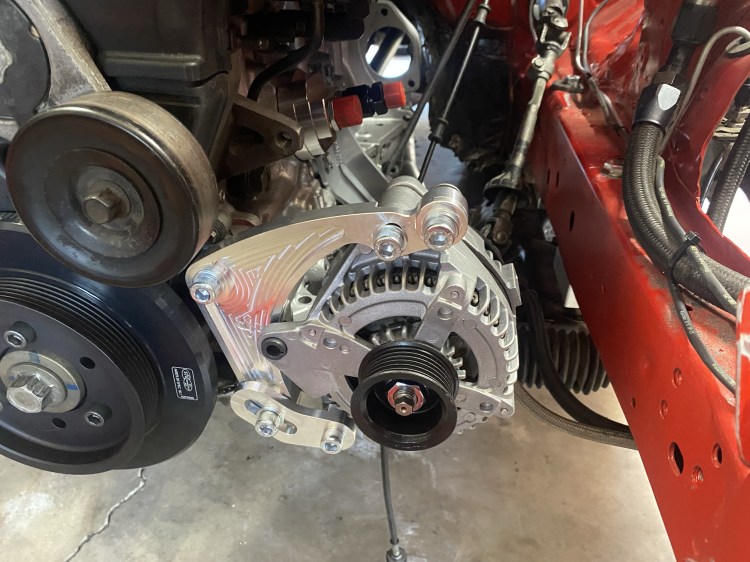
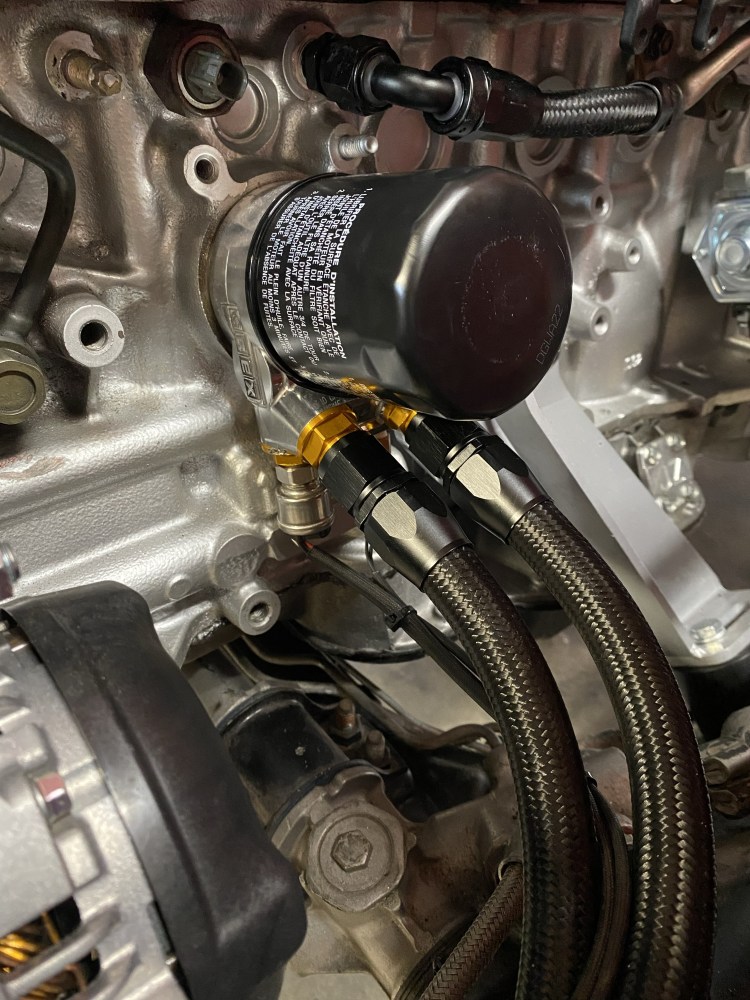
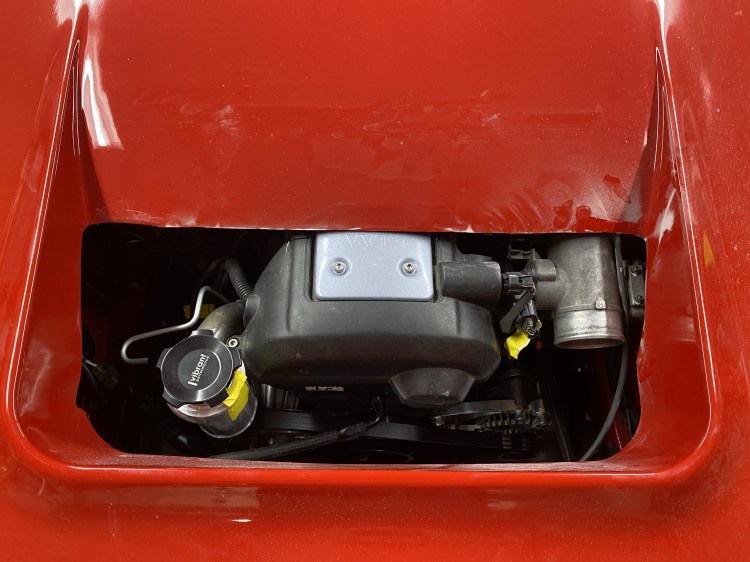
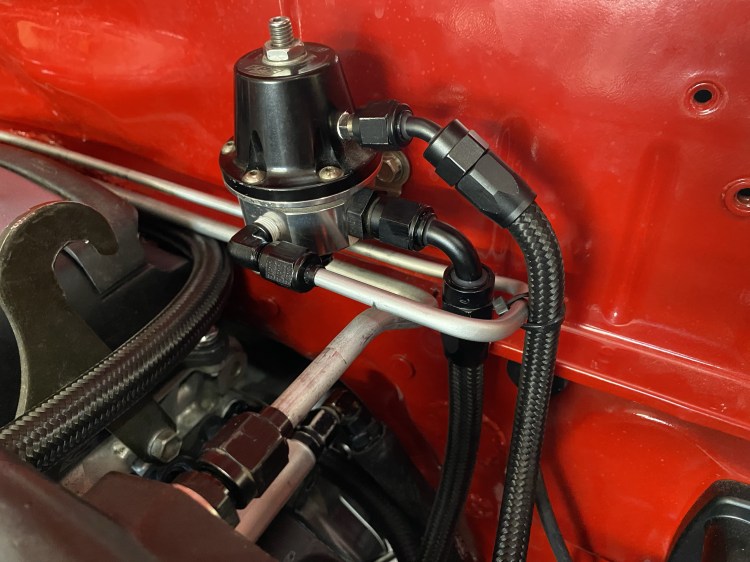
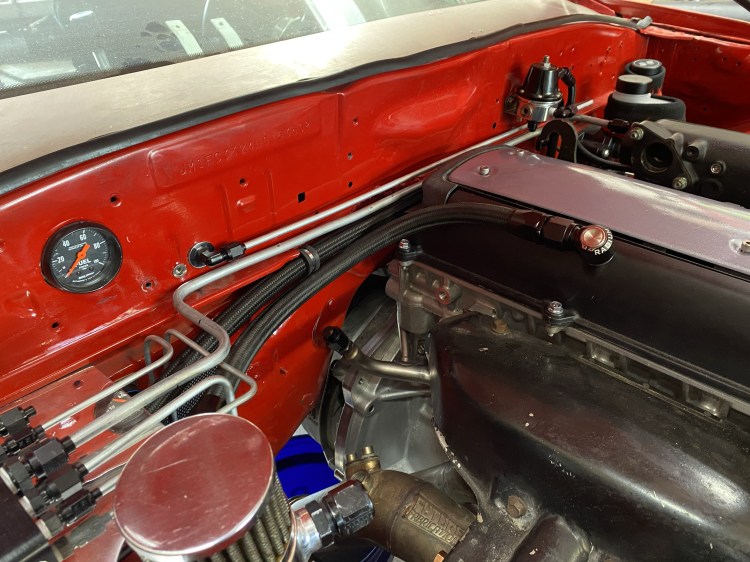
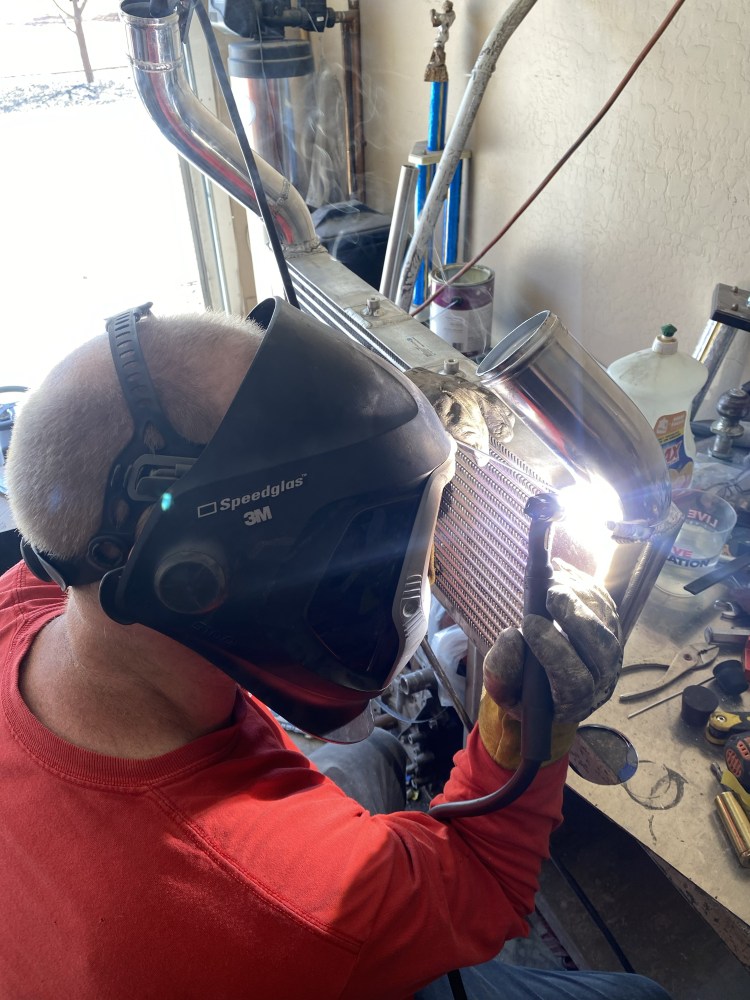
Found a good deal on an FRS dash locally. I have always enjoyed the way that they look.Started off by modifying the stock cluster to house the Defis.Defi + red/black fade = win.Started out by making a blank off plate for the center.A couple holes and the old red/black fade and we’re looking pretty.Interior starting to shape together.Hi Steele. He likes racecar. Yes, I tried bedazzling the dash. No, it doesn’t stay in Arizona heat. 😦The next fun project, chassis harness wiring. George wired this car in 2006-2007 and has seen a few different revisions/repairs. I needed to clean some of it up and make some sense of what everything was in case I need to repair something in the future.This is likely why the 1.6 didn’t run very well. Oil from the catch can had worked its way into the Raychem over the years.Some damaged wires at the bulkhead + oil = bad connection. What is this wire for you ask? The CAS, the thing that gave me notorious problems with the Miata engine.Yeah this just needs some attention. Just looka t it. Not perfect but starting to make sense now.Tidying up the switch panel wiring and adding new connectors. Wiring work is meant to be done indoors.Milspec Defi harnesses! The connectors were a pain to source.The old surge tank worked but left a lot to be desired. Like trunk spacing and not having the fear of getting rearended and catching fire are some good ones.The full Radium package with coarse filter, fine filter, DW lift pump, and dual Tanks 450’s. Of course Vibrant!The radium surge tank is an absolute unit. It’s capable of triple pump, but I am using it in dual pump configuration with two Tanks 450s.Custom fuel tank hanger with DW lift pump, AN everything, Racetronix wiring bulkheads, and a new OEM gasket. All while reusing the factory fuel level gauge.Top side of the fuel hanger. The AN bulkheads are threaded into the top plate and utilize a stato seal. Racetronix wiring bulkheads ensure proper connections.AN6 hardlines for the surge tank. Tight fit all around.Radium surge tank and hardlines version 1.0. Rough idea of original desired location.Make new fuel lines again, but now down the left frame rail of the car. Bulkheads added for ease of installation/removal.This is hardline probably version 5.0. I changed my ideas and location so many times. Joe at Action Fab made me this tidy box so I don’t have to run a firewall in the car.I cut the box up and added a bunch of speed holes into it.Couldn’t hide all that hard work inside the box without showing it off!Windows all around. They utilize bolts, nuts, gaskets, and lexan. Much better look and still keeps the interior isolated. Also makes for easy diagnosis of leaks.These T fittings are the supply ad return from the engine. The caps are used as drain ports in case of engine work.New Chase Bays dual brake master with 6:1 pedal ratio.New Chase Bays dual master and billet clutch reservoir. The 8.8 hangs low and was dragging at times and caused the seal to break and the cover to leak. (bad driving)The dragging cause raised material that needed to be addressed.Solution, take 1/2″ off of the bottom of the diff cover to make it so when the diff drags, it will drag the casing and not break the seal on the cover.There is still 3/4″ of sealing surface on the cover.Ditched the old delrin mounts and switched to the Mazda competition mounts. Fresh Motul 75W90.Rear end reinstalled and looking pretty again.The hub debacle. Ronin had the hubs hardened harder than the ARP studs and caused the studs to eventually spin. No studs are made harder than the hub unless you switch to M14 studs. My Granpa helped me machine the hubs and utilize E36 M12 screw in type wheel studs.FINALLY!! I’ve been after a Ground Effects hatch for years, but the owner would not sell it. I got it for a good deal, see left side of photo at the top of the hatch.Started doing fiberglass repairs. The RE wing was separating in several places and needed saving.Hatch mocked up on by battled car.A couple more parts that I had been after for a long time! Panspeed hood and RE mirrors. Unfortunately, the hood was cut for a V8.Panspeed hood venting with the V mount.The hatch had both mounts ripped off and was in desperate need of repairs.Luckily the previous owner had all of the pieces which made this a lot easier for me to repair.The studs are a floating bracket which made for a tricky repair.This was repaired in several stages to get the strength back. I started with a layer of fiberglass; the caps are to keep resin out of the studs so they can float.A layer of carbon and then a final layer of fiberglass, not getting too close to the studs.Fit up of the hatch after glass repairs.Starting with getting the drop vent back to the shape it should be. The hood was stored sitting on the vent and caused the hood to become distorted.Fiberglassed the dop vent, aero catch holes, hood latch hole, and other random holes.Starting to come back together. Glasswork done and fit up.Took the car to Nicks to fix the multi-colored look. Fenders and aero repaired.This car has been painted a couple times in a couple colors. Is this like a tree where you can tell its age?Prepped and ready for a good time. Nick convinced me to weld the holes for the old over fenders. Thanks for the push on that Nick. Worth the extra time.Nick sending me photos while I’m at work.This car is red.This car is red!Jeff and Dakota helping with moving the car to and from Nicks.Rebuilt the door handles with the JDL Manufacturing billet inserts.Build more C5C2 Panasports. These are baby spec becuase of the parts I had. These are 17×9 +32.Here comes ole’ reliable. Max had a good engine for me. We resealed the engine and installed a Fluidampr.Loaded up and ready for its new home.Welcome to the show JZ.First things first, convert to AN lines. The turbo feed has a Turbosmart inline filter.Water lines converted to AN.For the adapter plate, you knew I would stick with my friends Adamat Perfomance.Adamat Performance twin disc kit.A simple install for a badass kit.JZ and ZF mated up. Xcessive Manufacturing conversion motor mounts and a new starter.Bolted in it’s new home.Modified the transmission mount to push the engine back as far as possible. Shortened my DSSR.Phoenix rack and axle got the driveshaft modified and ready for the car. Undercarriage showing its years of abuse.Hotside cleaned up and ready to party.Reworked the Action Fab exhaust to flip to the passenger side and adapted it to the Future Fab downpipe.Teh start of the swirl pot.Same side inlet/outlet swirl pot made for a tight fit. AN16 water outlet.Lower water neck converted to AN16.Radiator modified to make it a tighter fit for the AN16.Fun little AN16 hoses to make and install.Everything nice and tucked up above the frame rails/subframe.Fluidampr and Suspicious Garage alternator relocation.Suspicious Garage alternator relocation with a SC430 130 amp alternator. P/S bracket not pictured.Waterline converted to AN8. Death to rubber lines.Grex thermostatic oil filter sandwich plate with AN10 cooler lines.Trimmed the hood to clear the engine.Fuel pressure regulator line work.Fuel pressure and vacuum block hardline work.Nick did all of my aluminum work and made it so the car would be done in time. All while going on his vacation and preparing his own car for events.1JZ swap completed. You made it to the end, thank you for your support. ❤