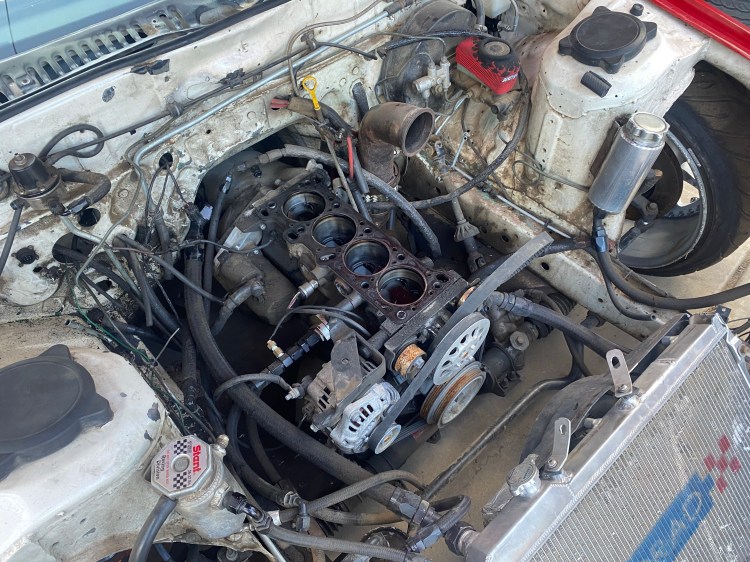
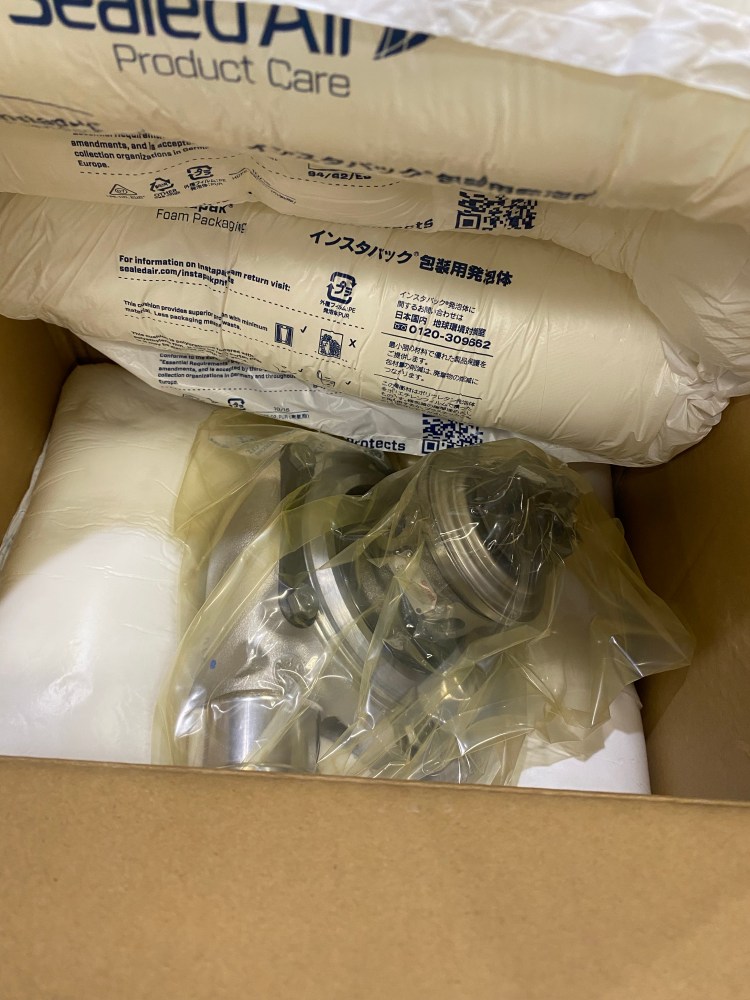
Well well well… here we are once again. A very unhappy 1.6 and a very sad Kyle. I had originally planned on keeping the upgrades fairly simple; solid lifters, dual valve springs, camshafts, and a modern ECU. The engine had other ideas I suppose. My car originally broke a throttle body on the dyno at UMS. They disassembled the intake side of the engine to inspect the internals of the engine and said it was good when they checked it, guess not.
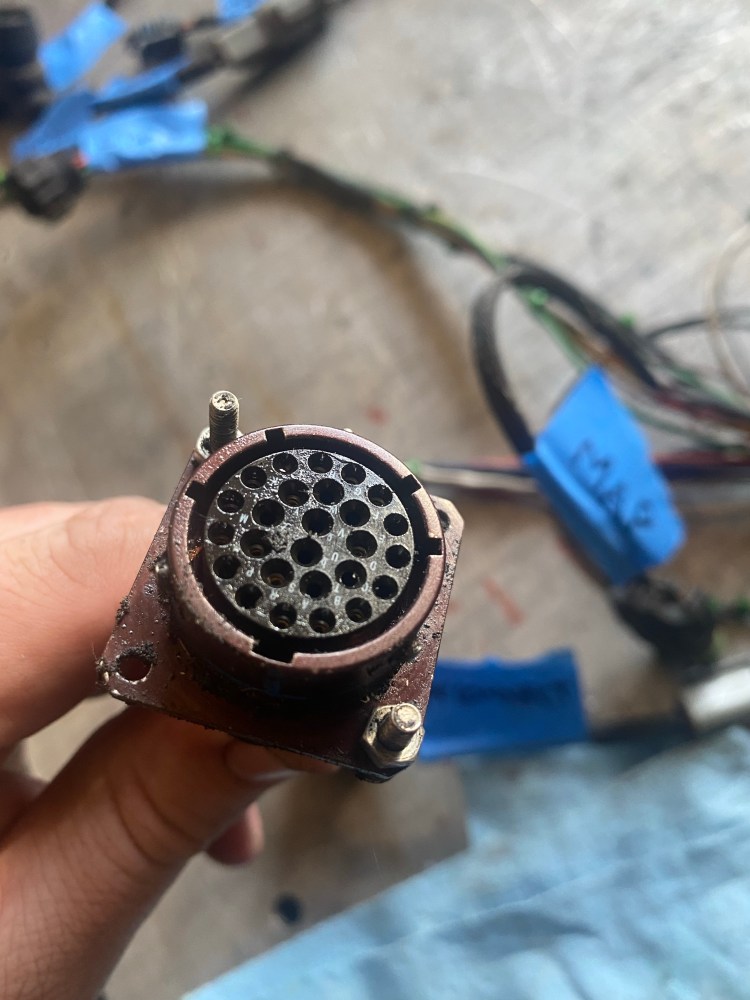
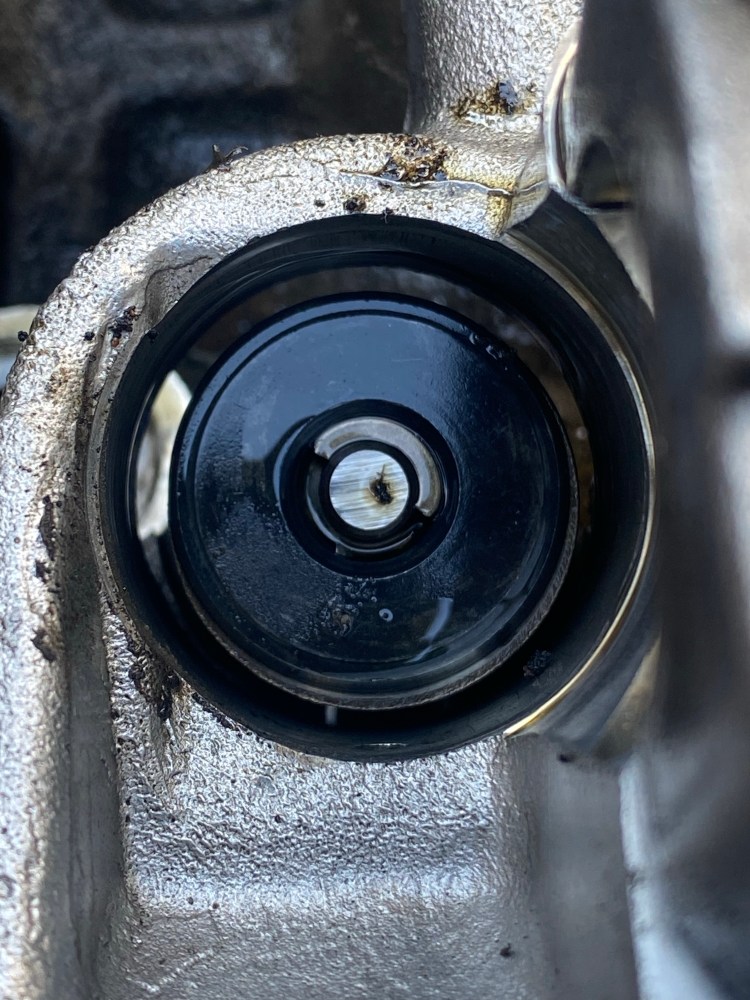
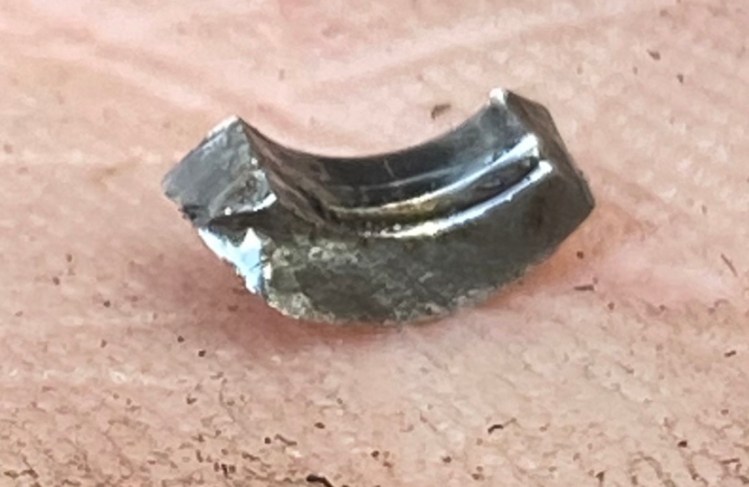
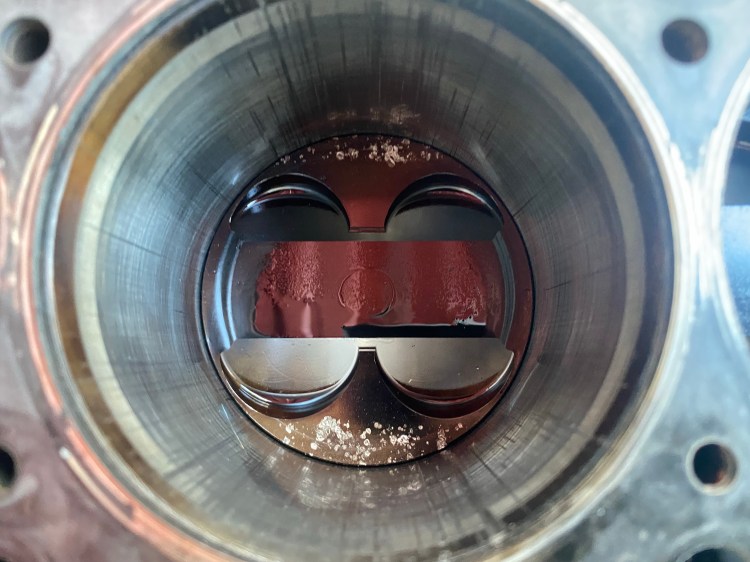
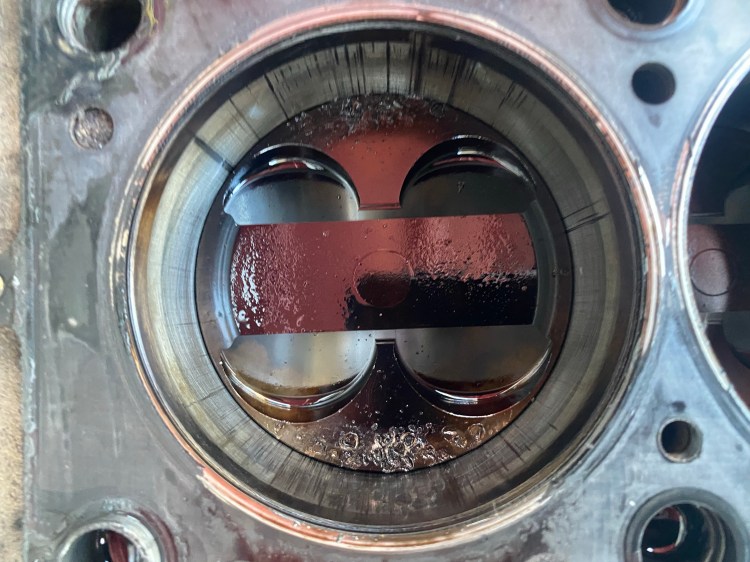
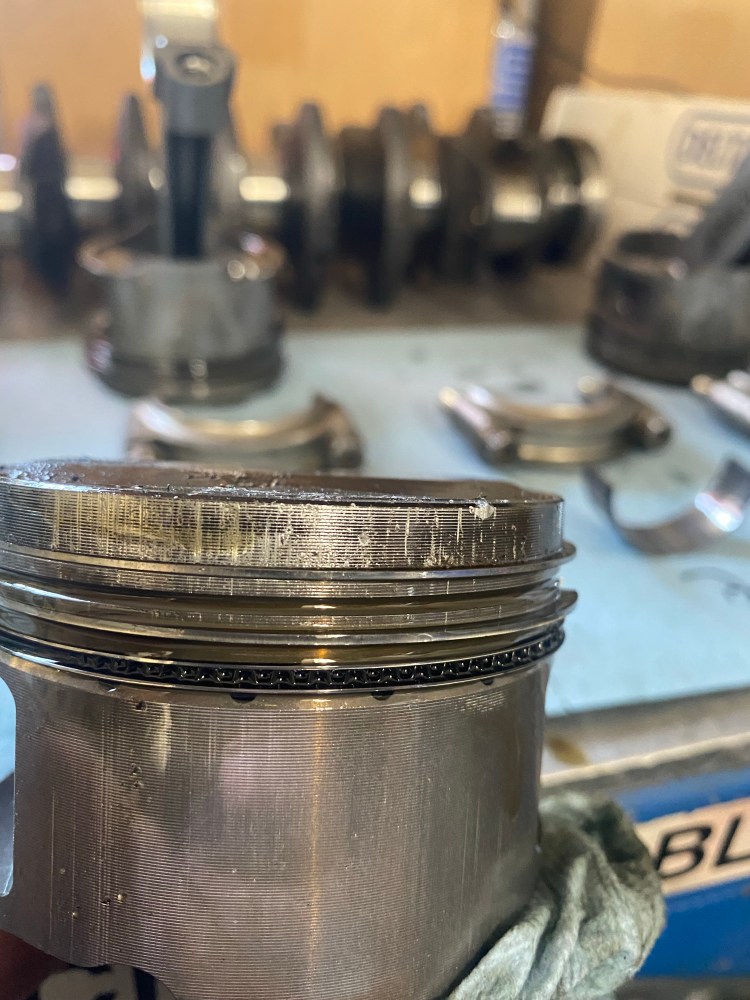
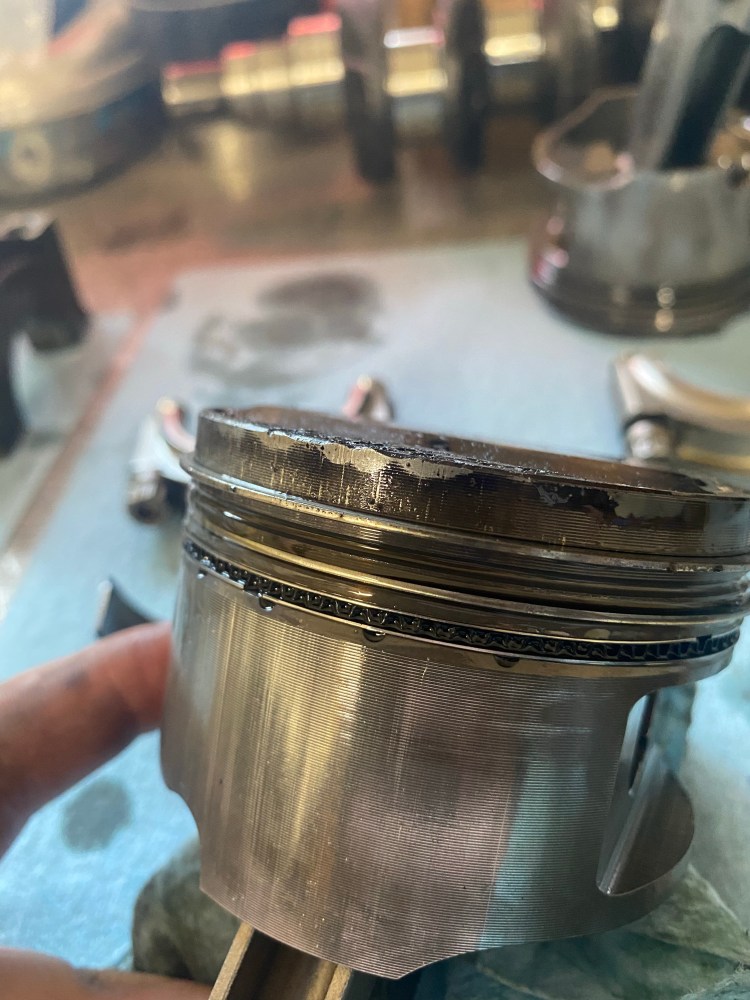
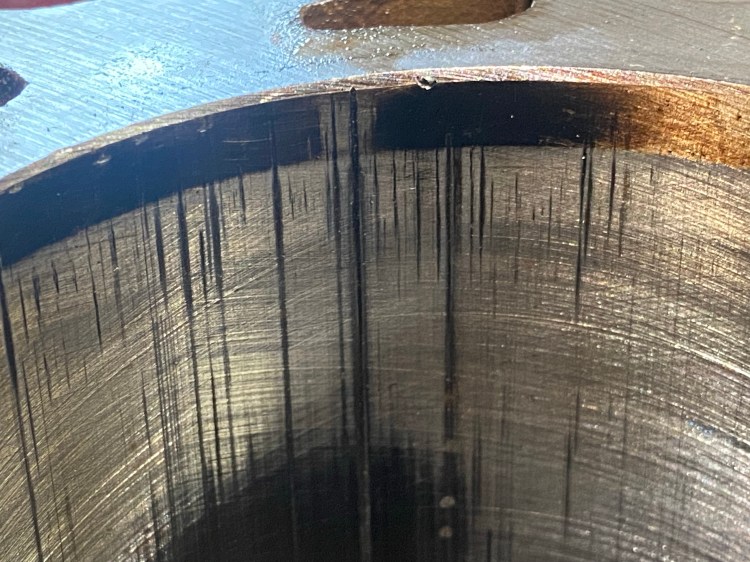
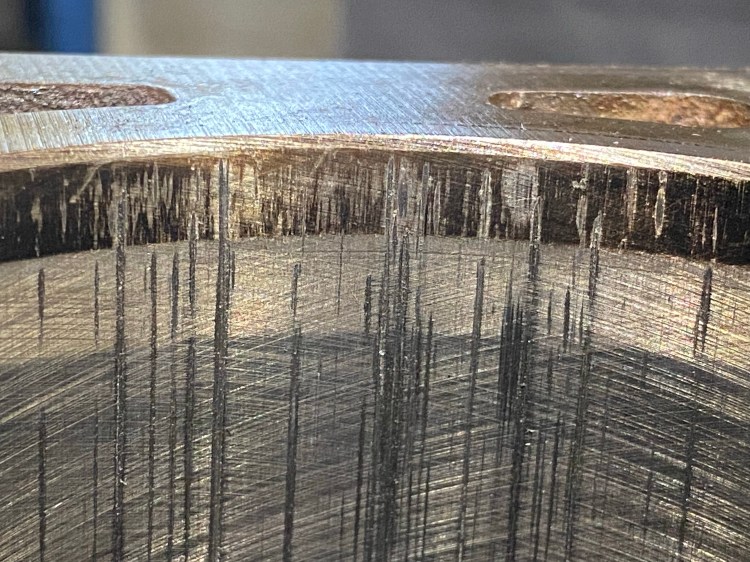
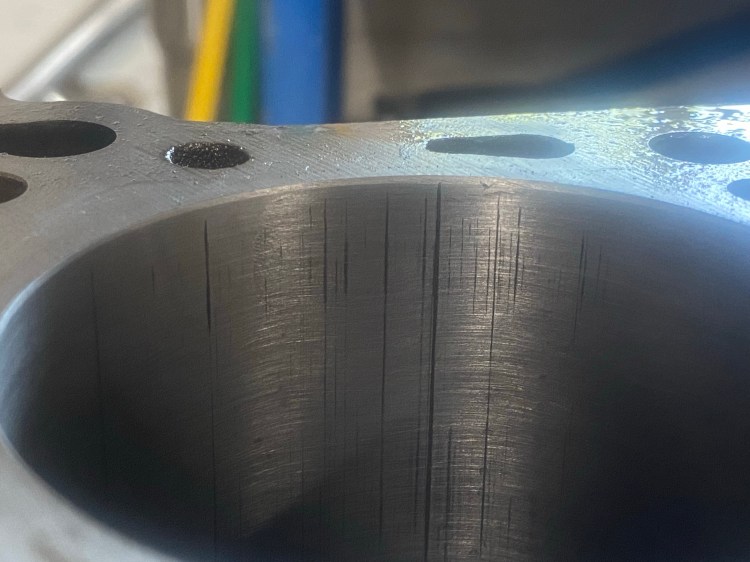
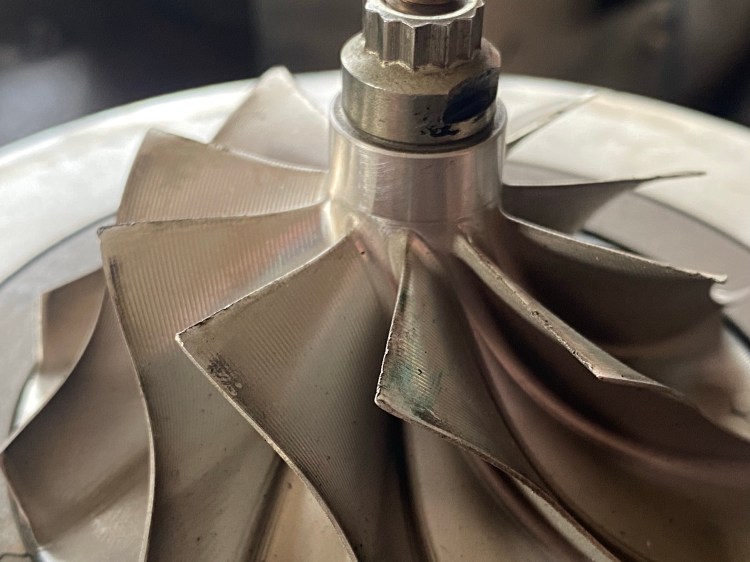
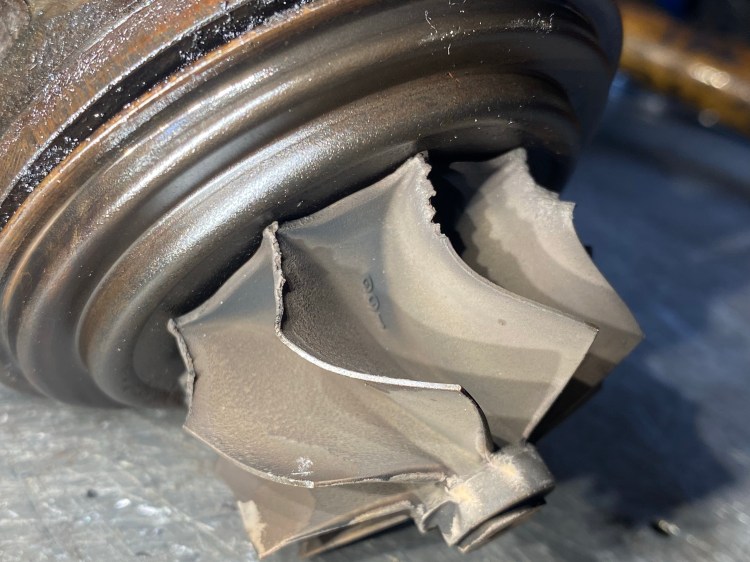
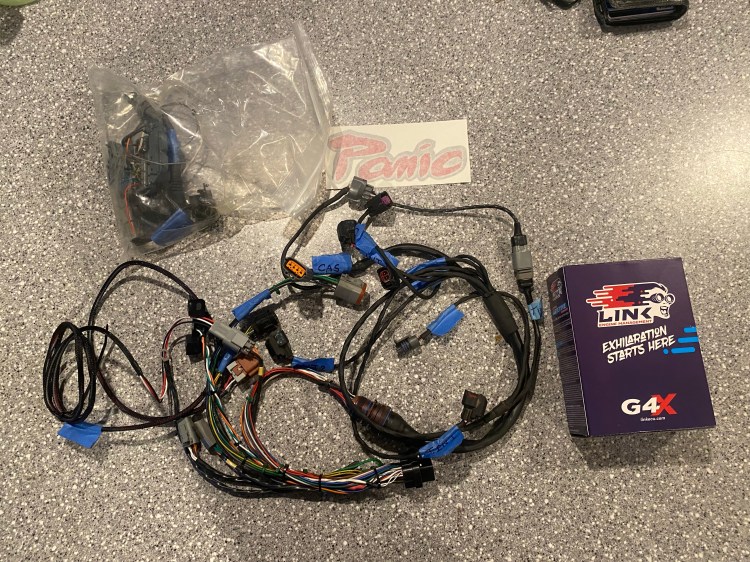
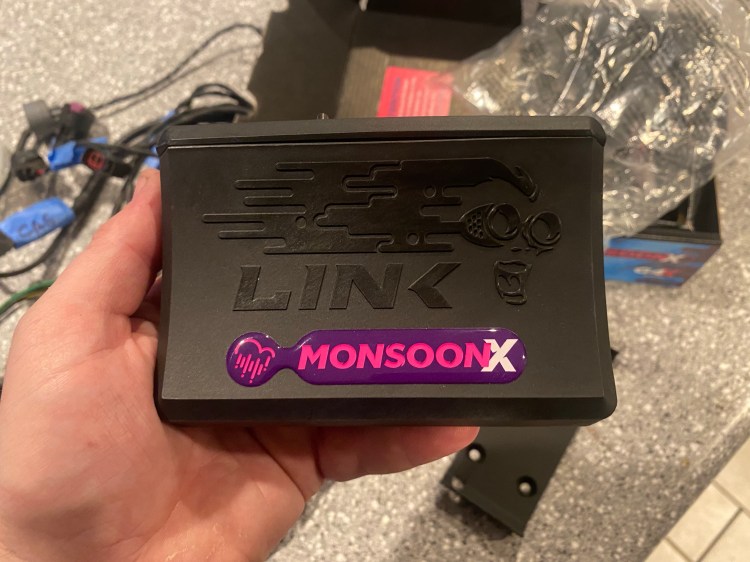
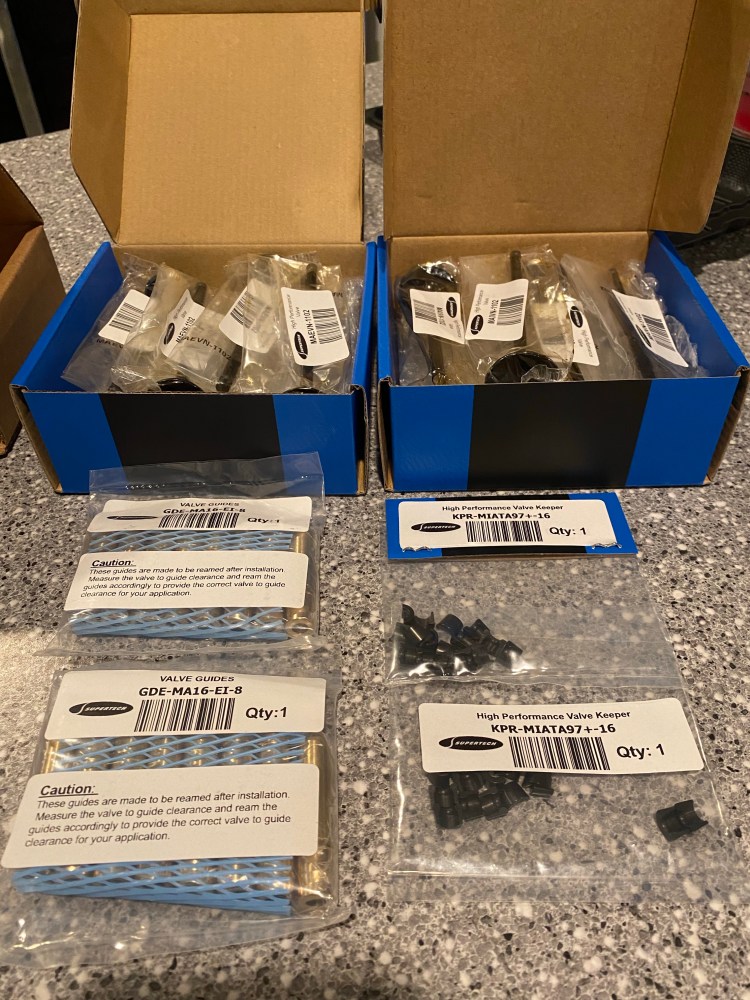
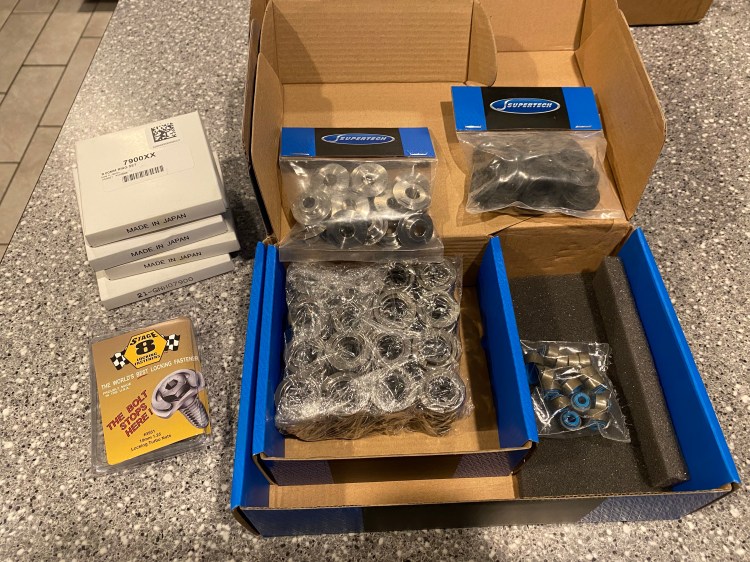
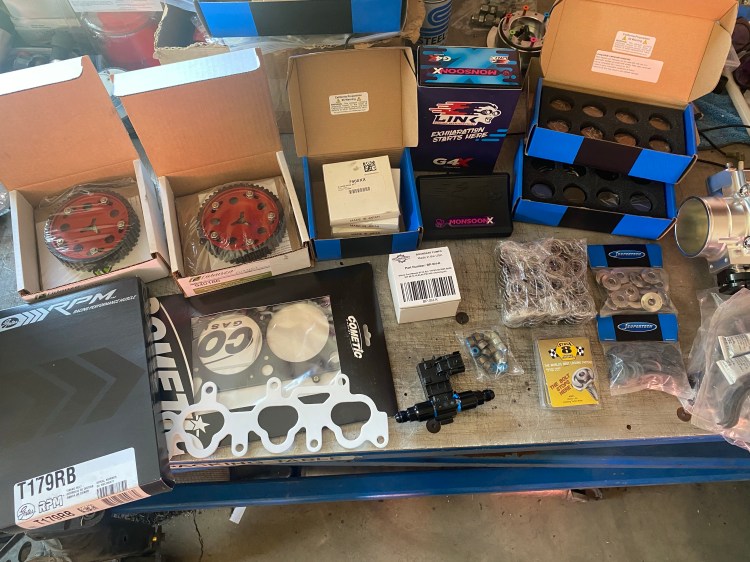
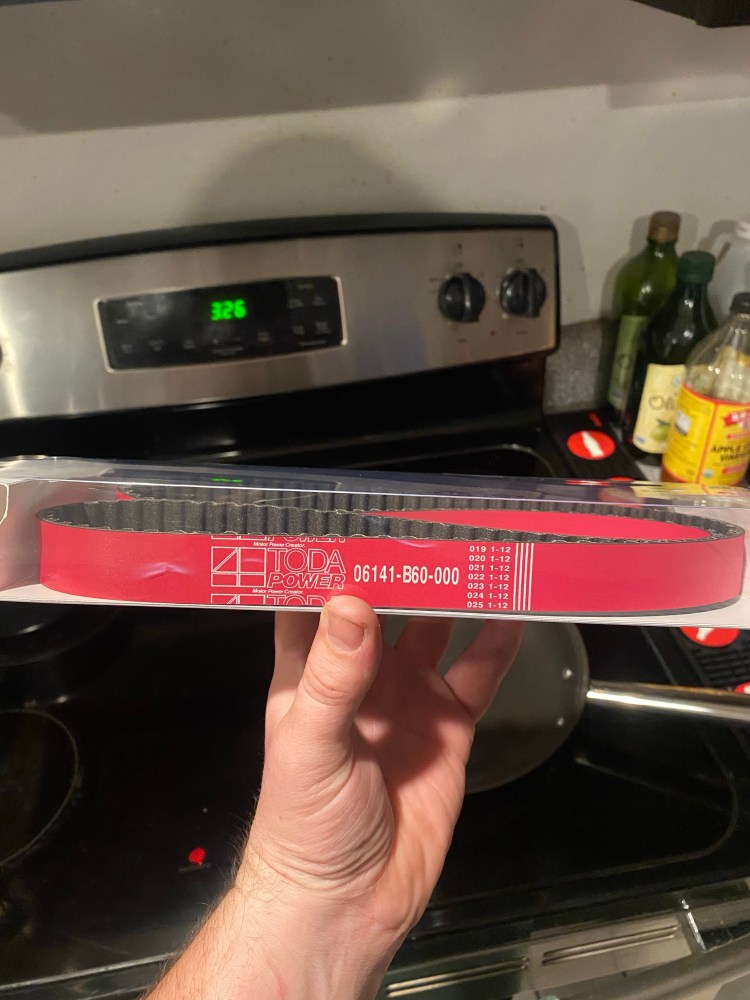
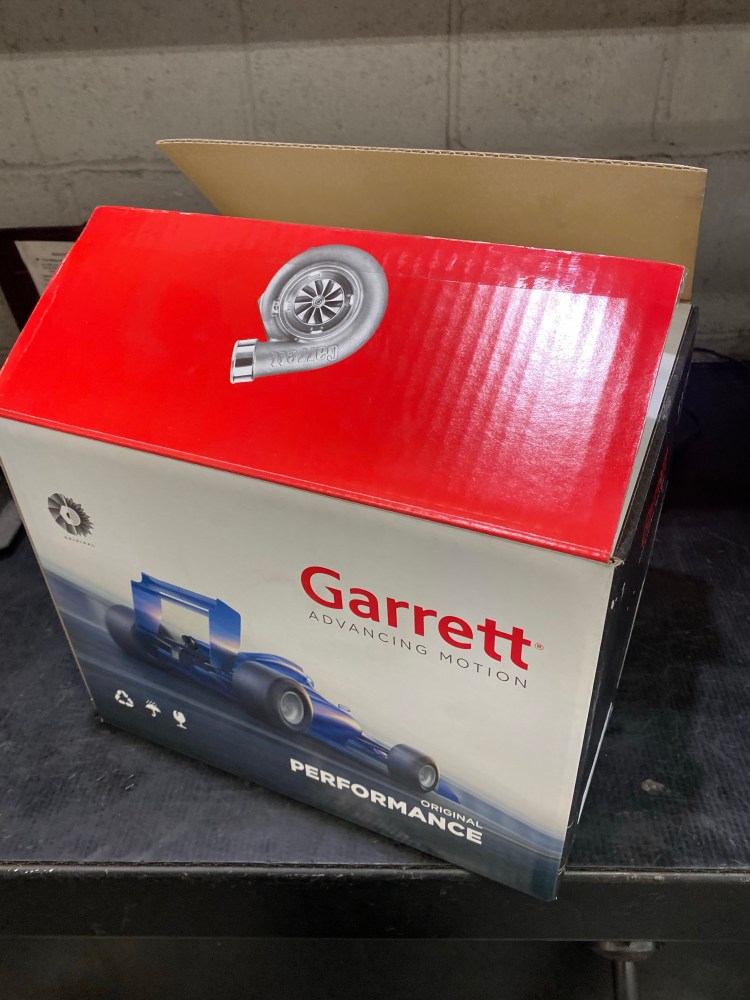
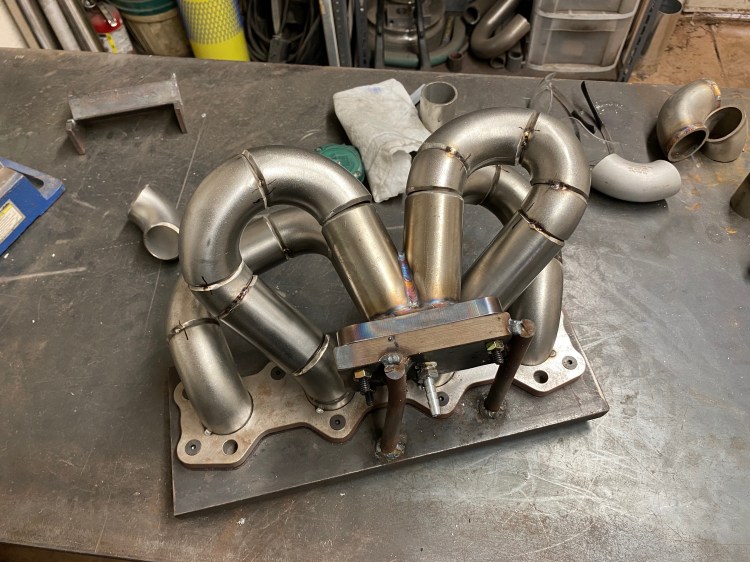
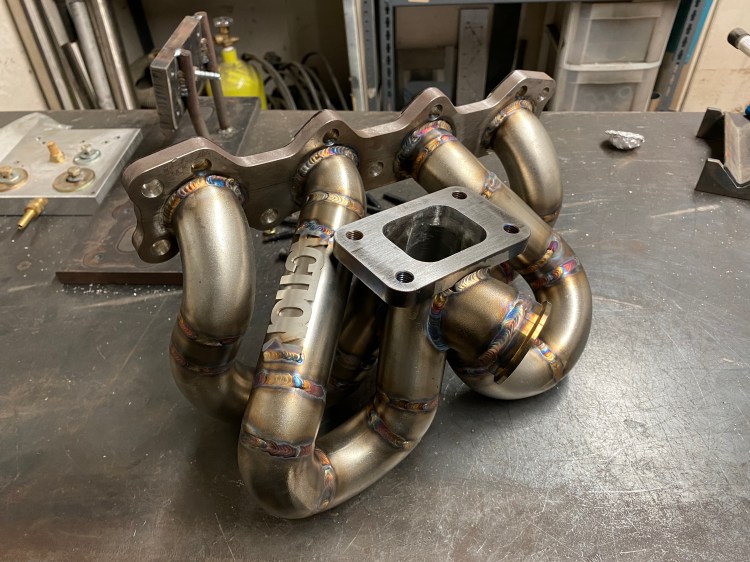
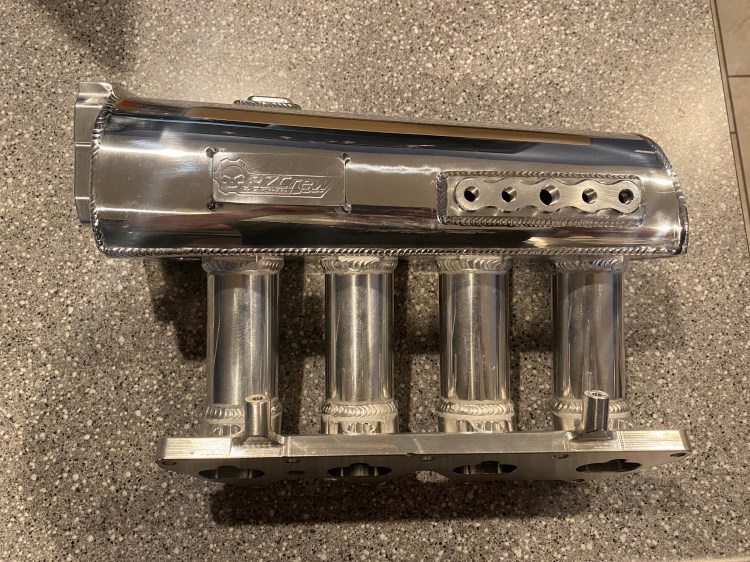
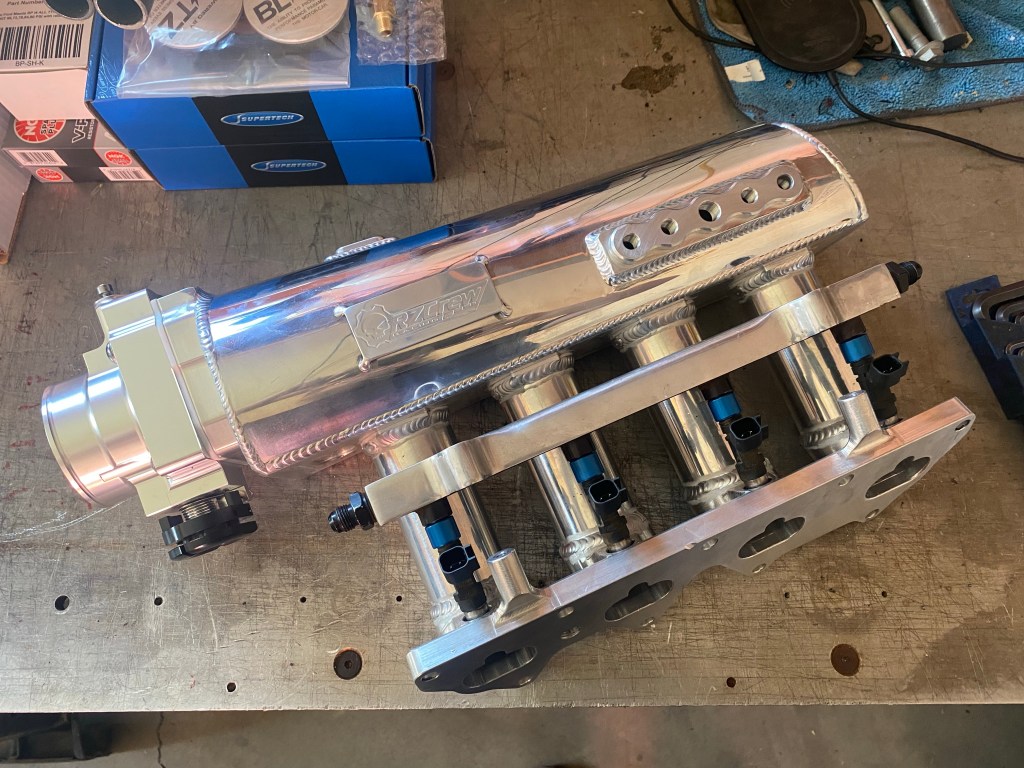
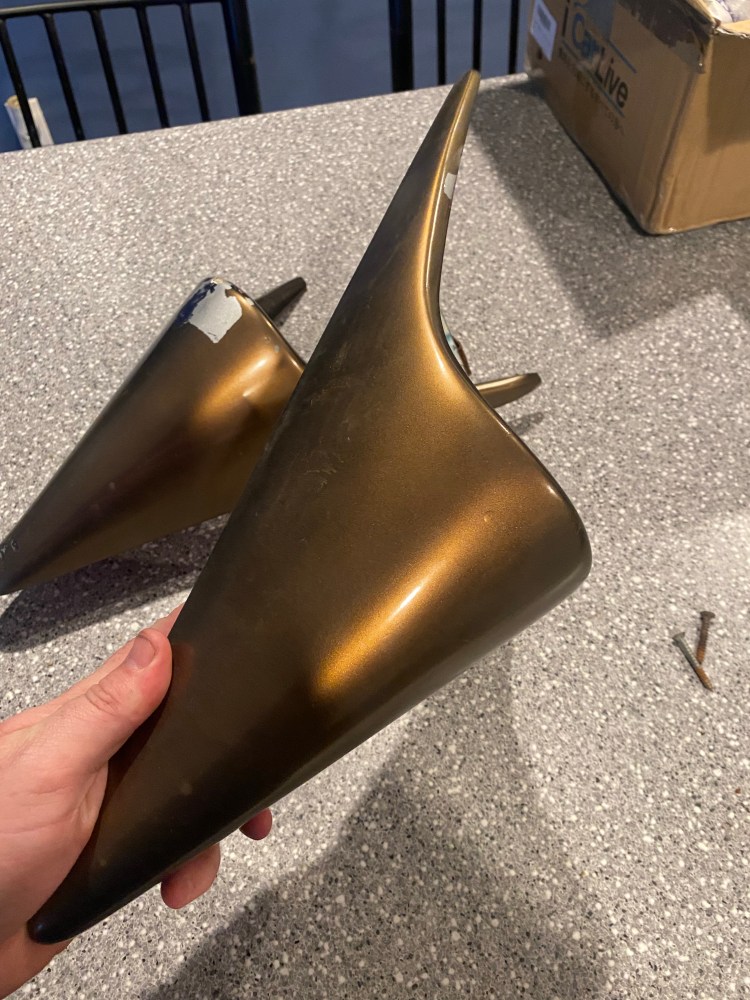
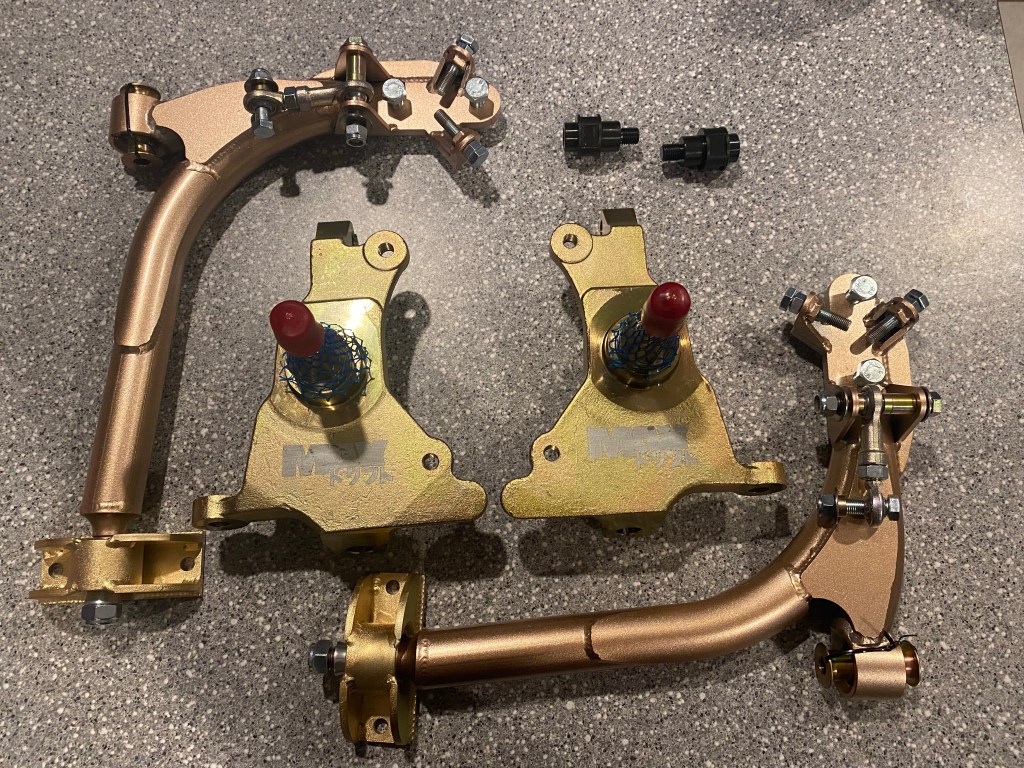
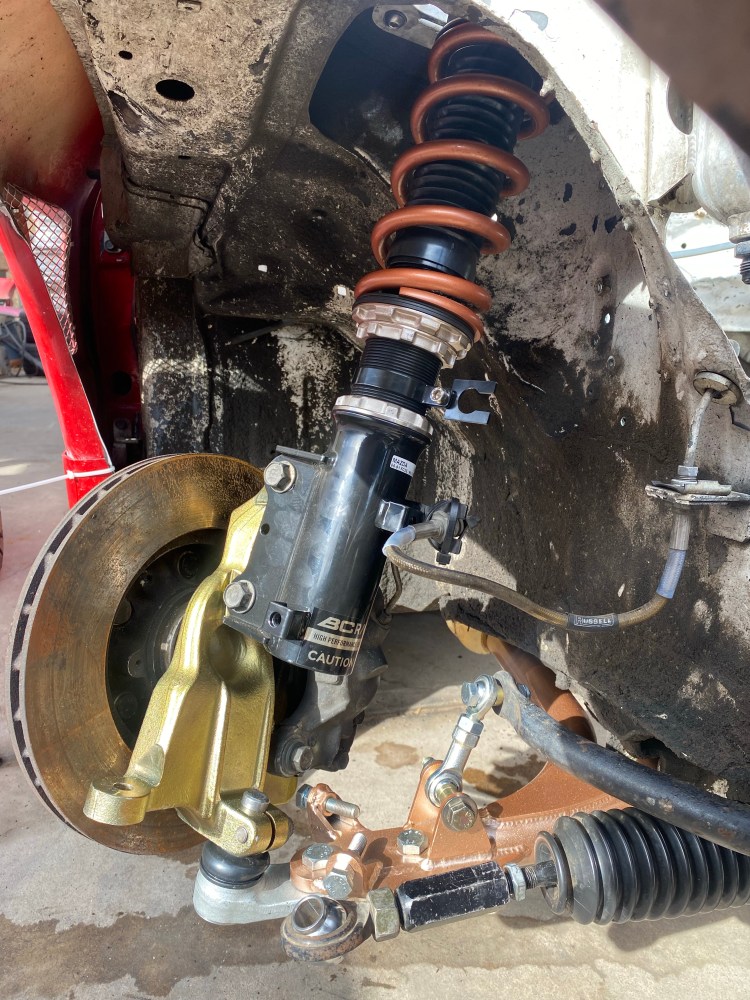
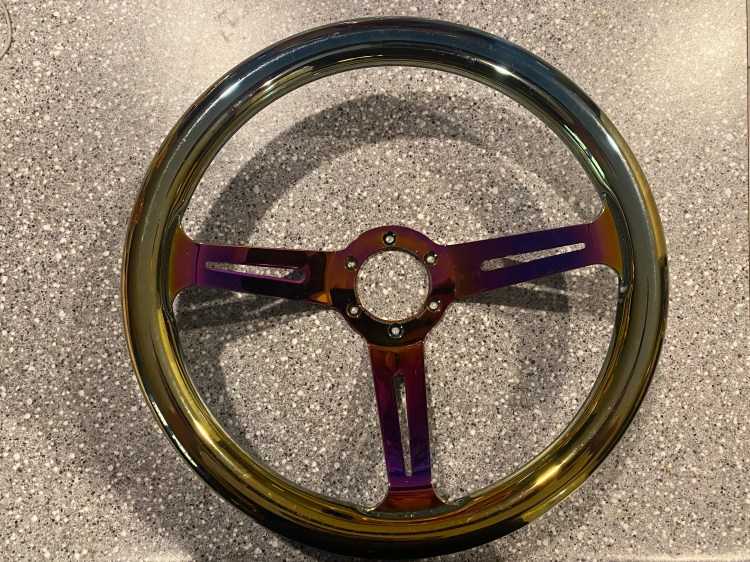
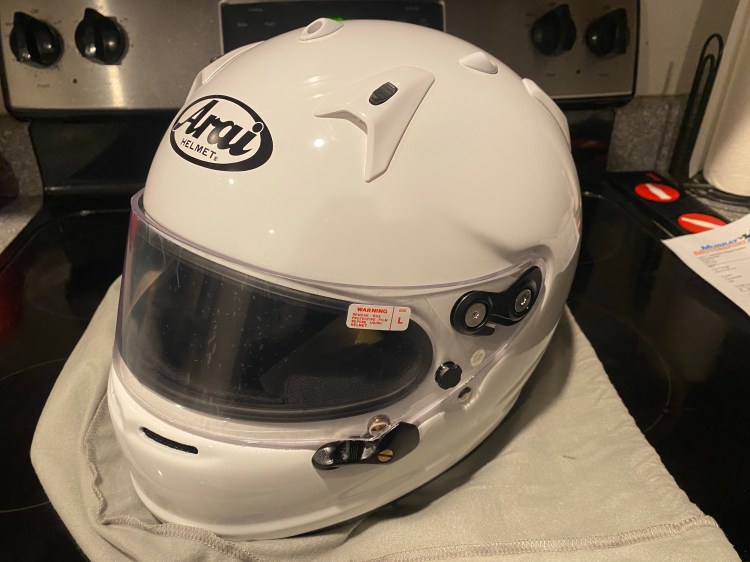
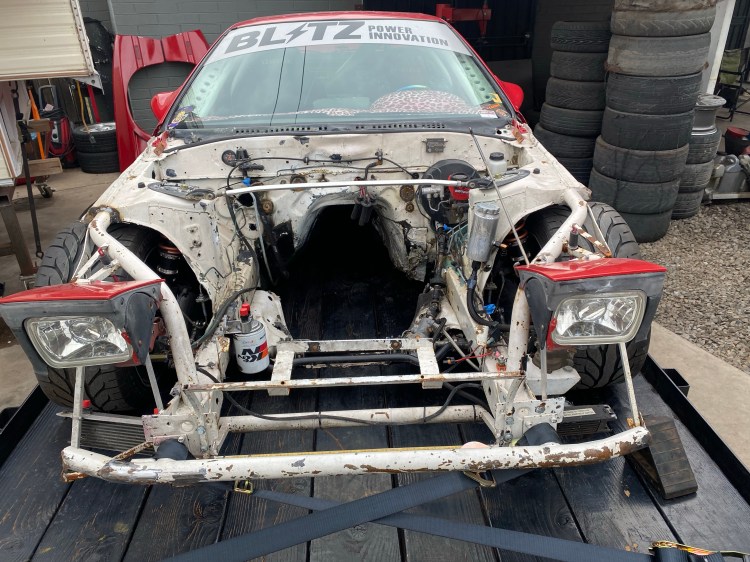
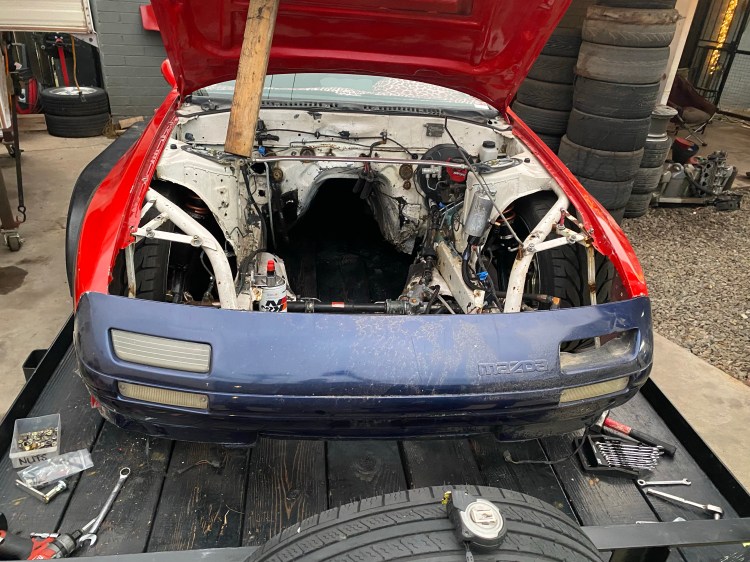
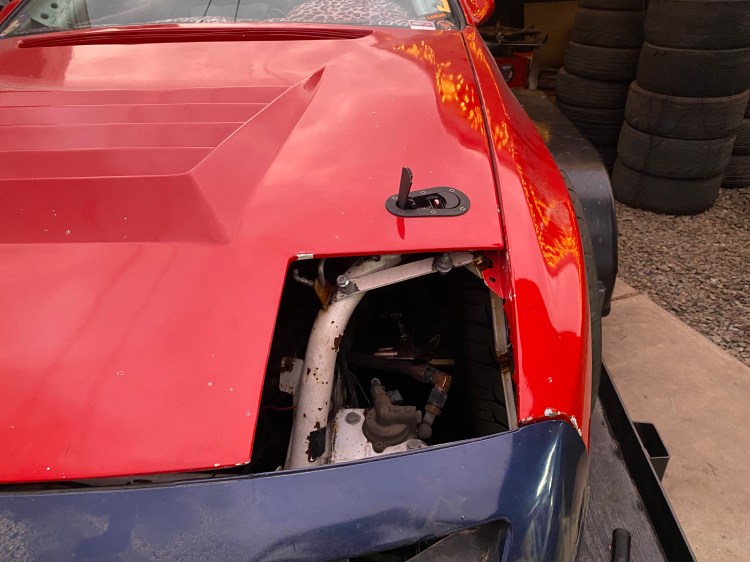
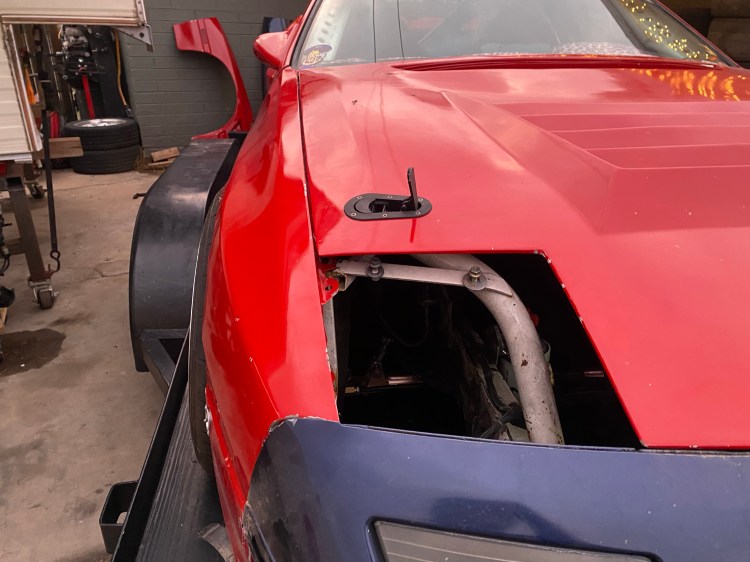
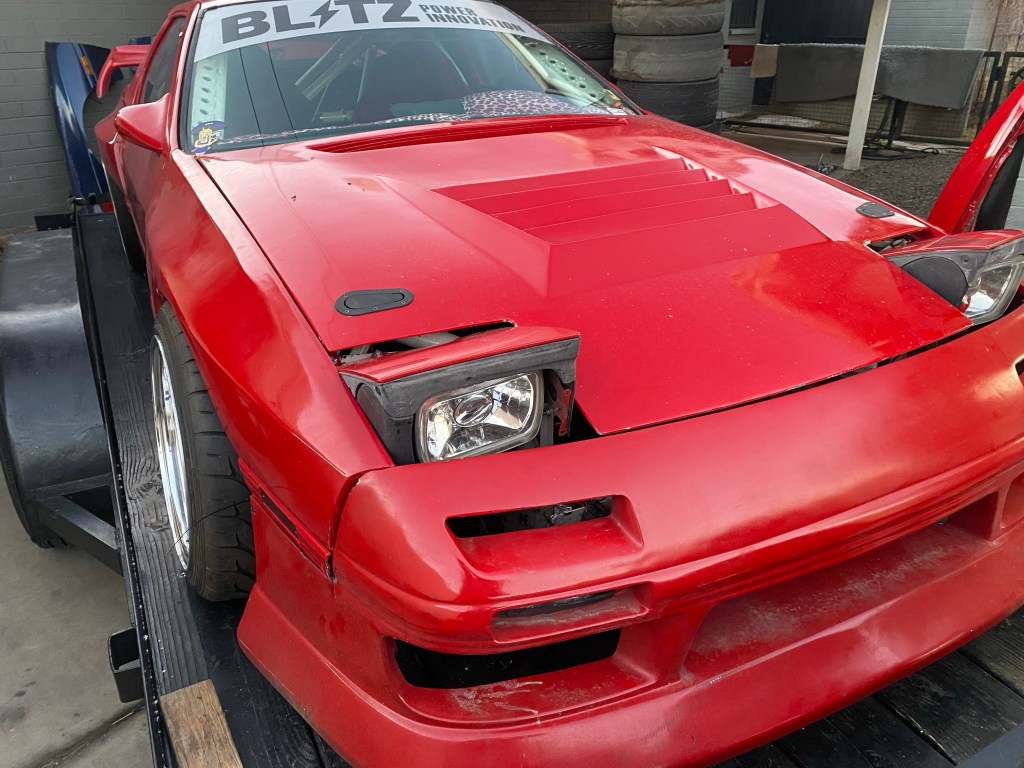
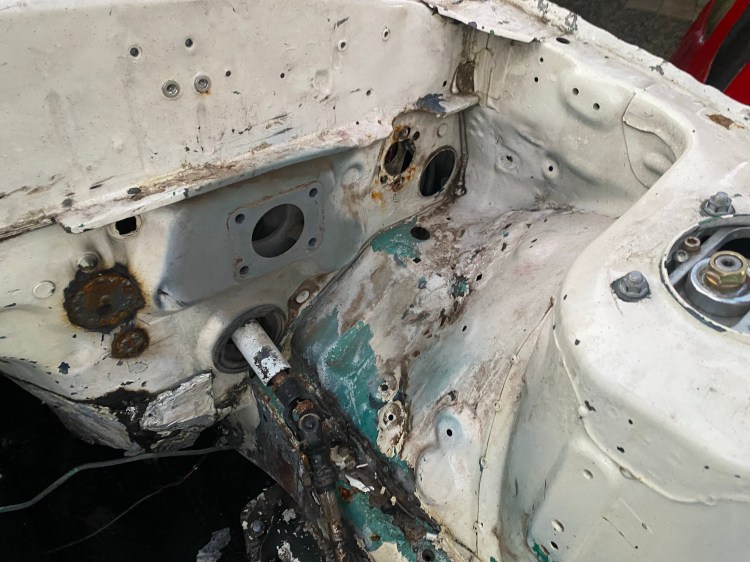
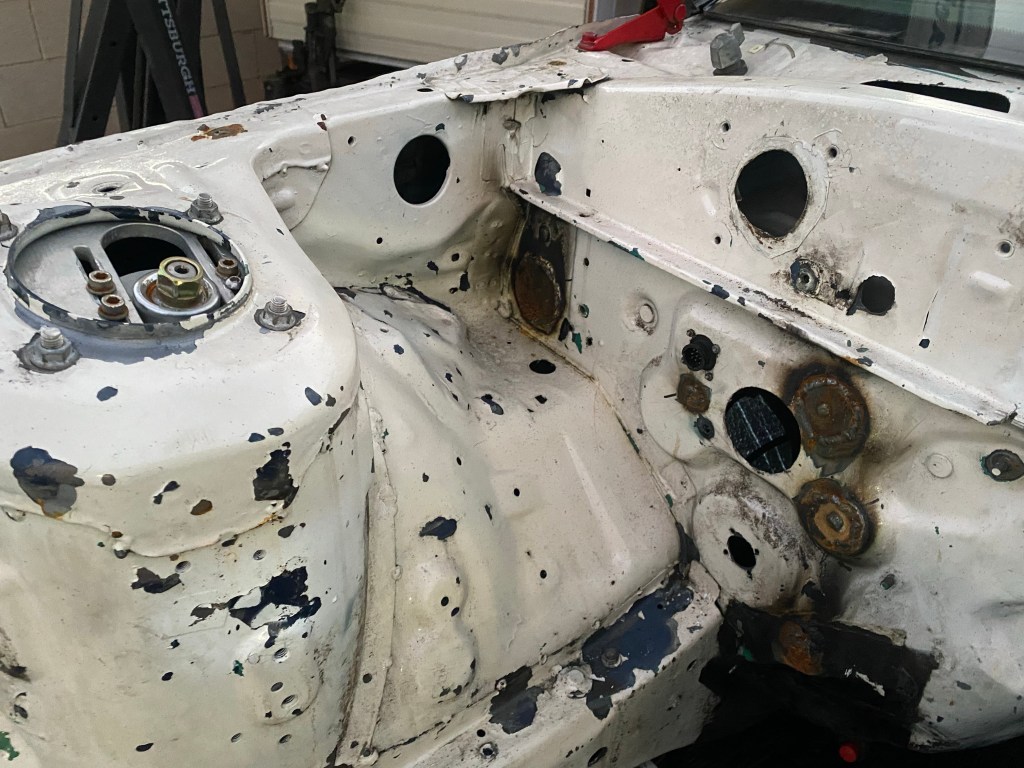
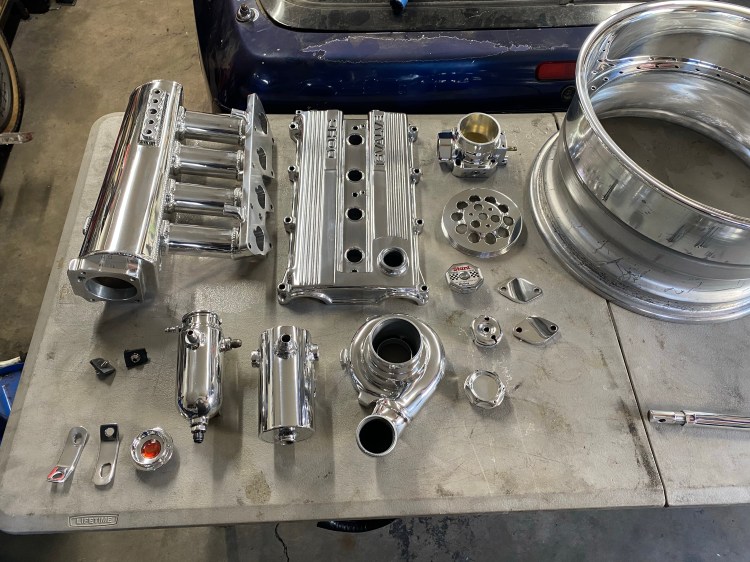
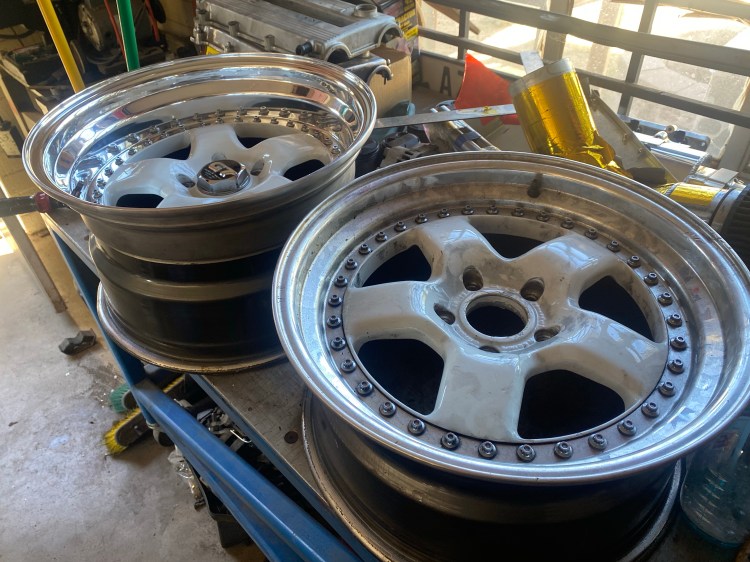
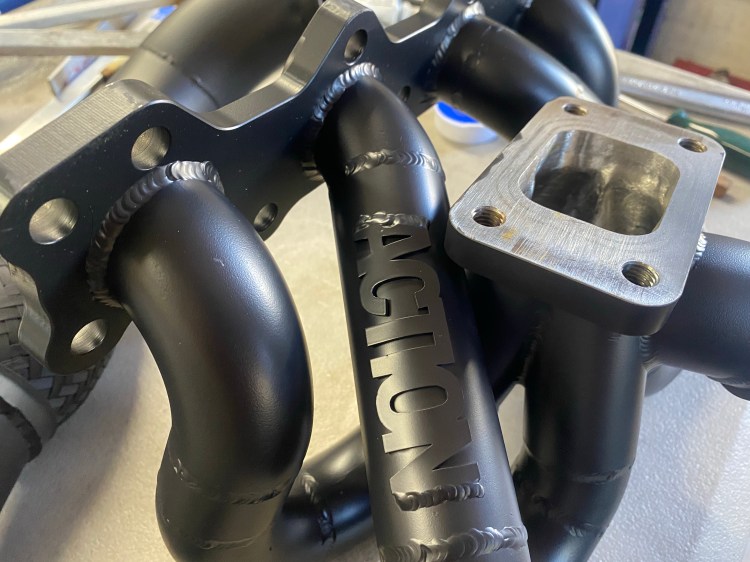
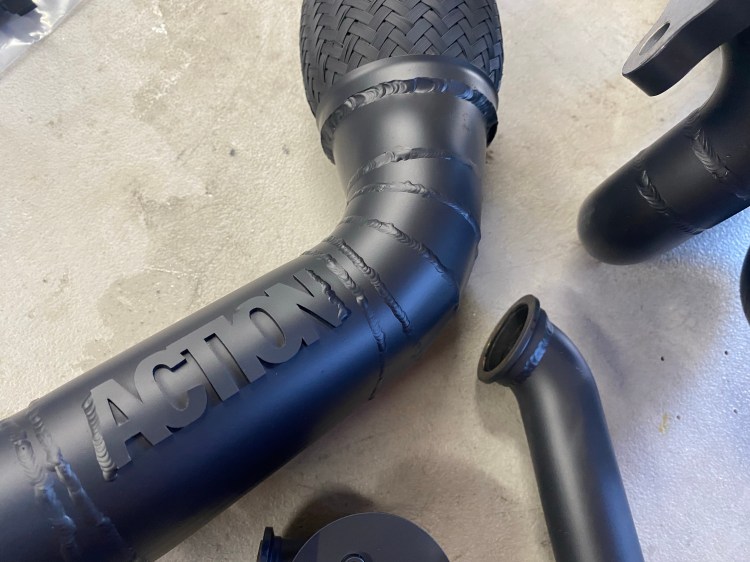
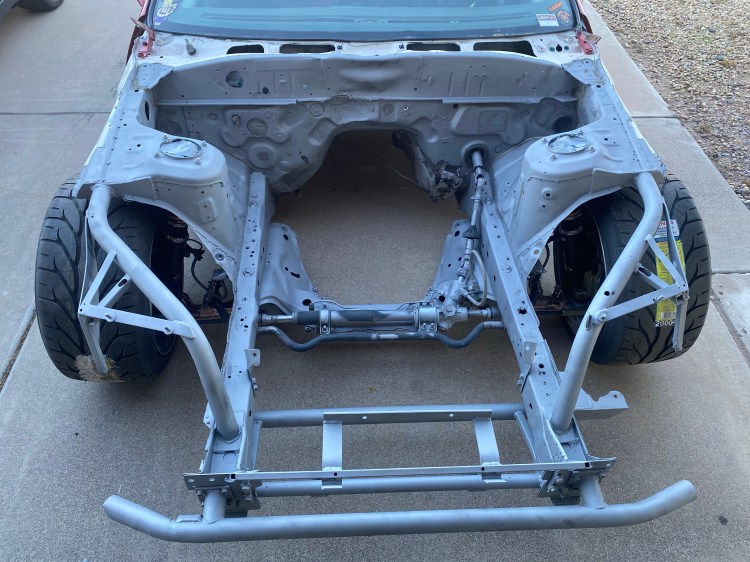
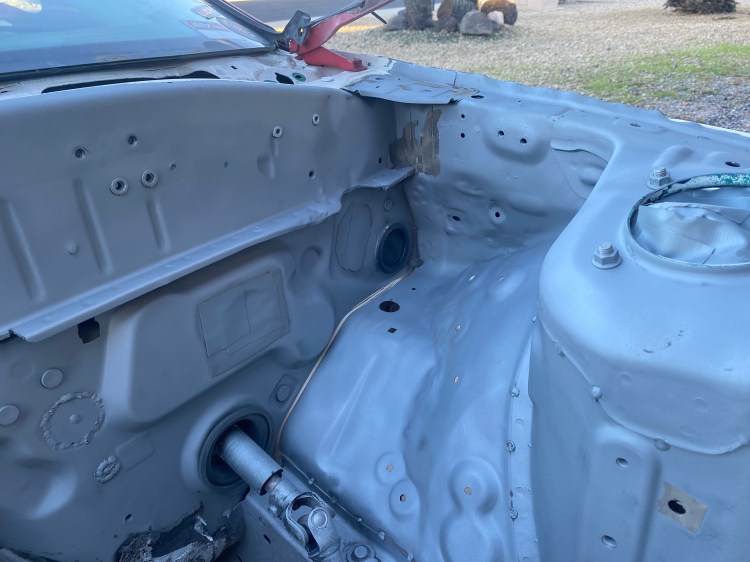
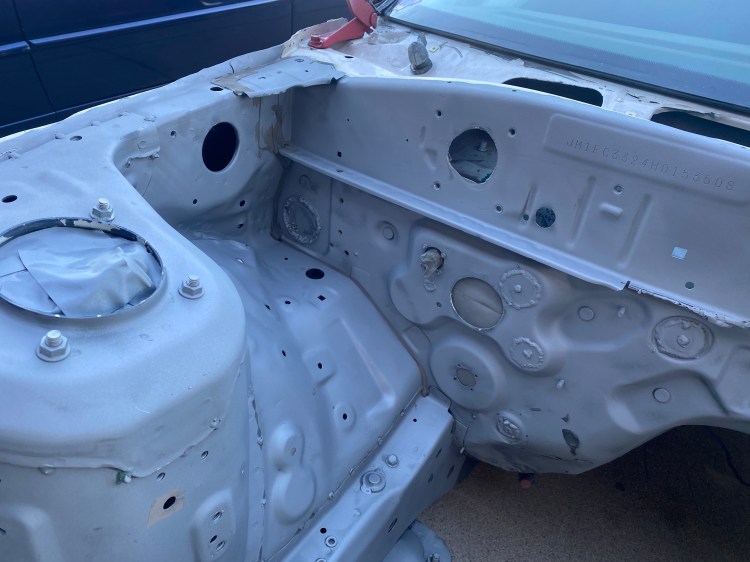
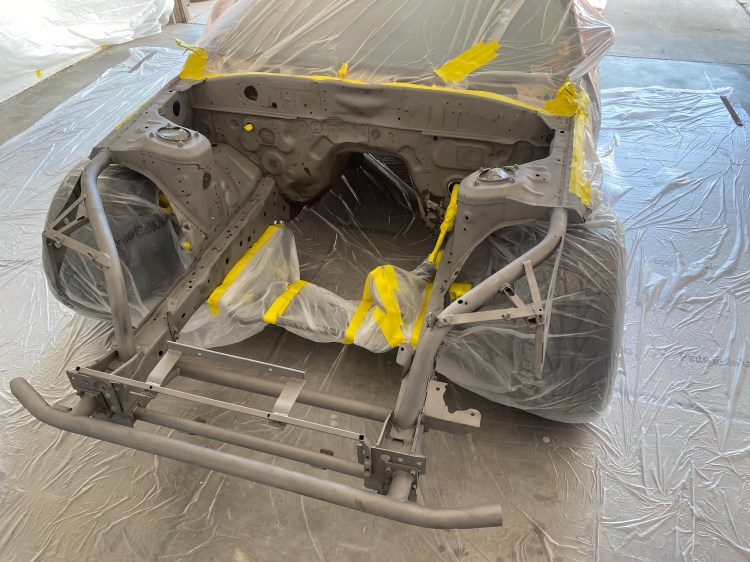
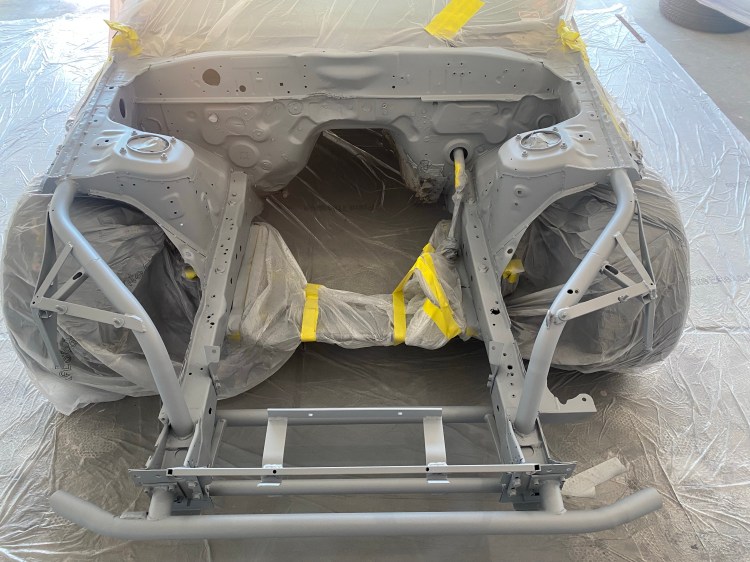
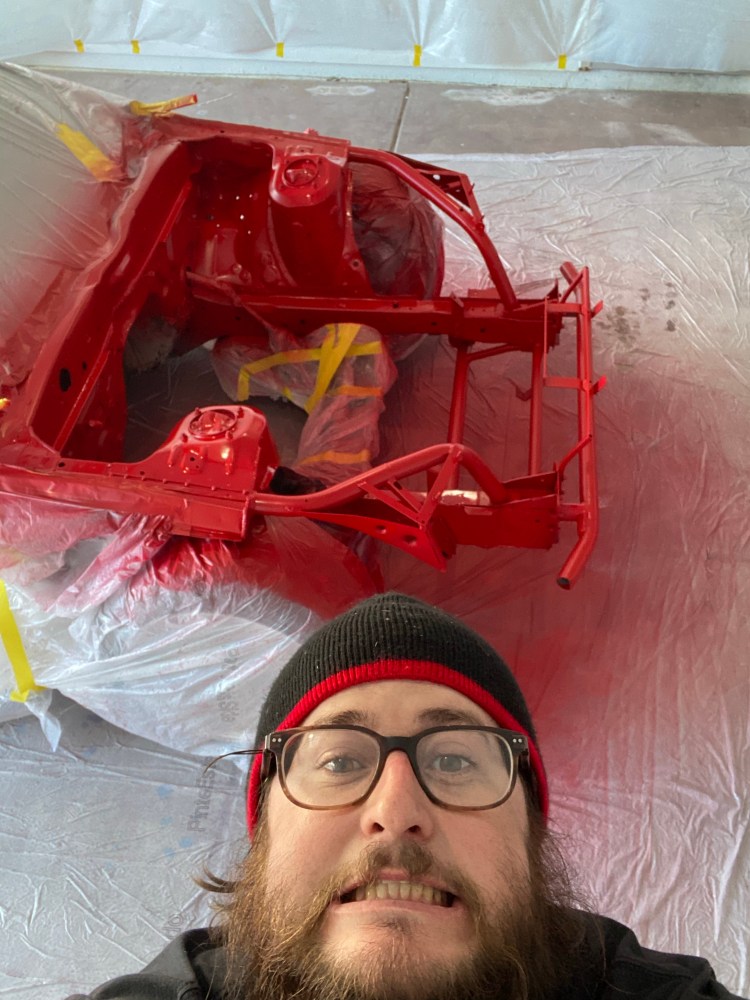
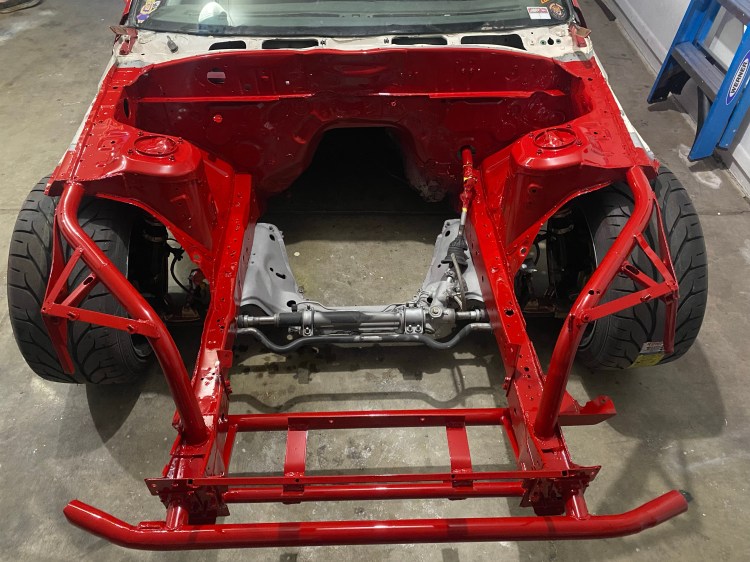
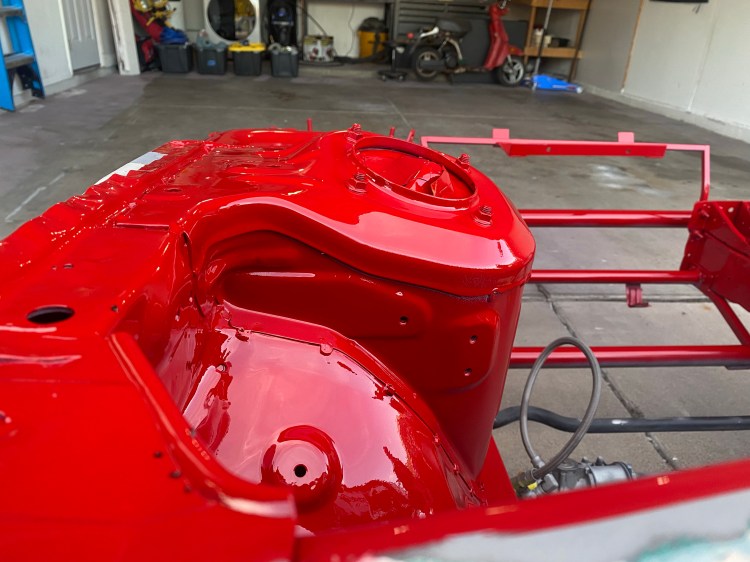
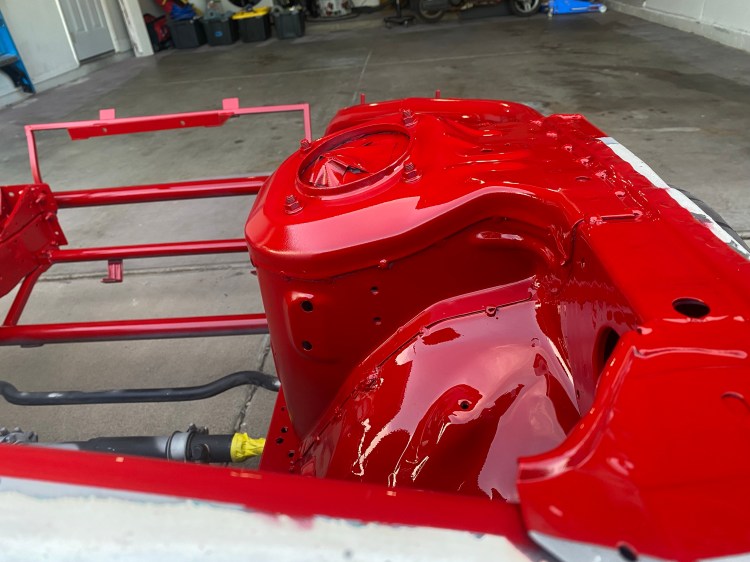
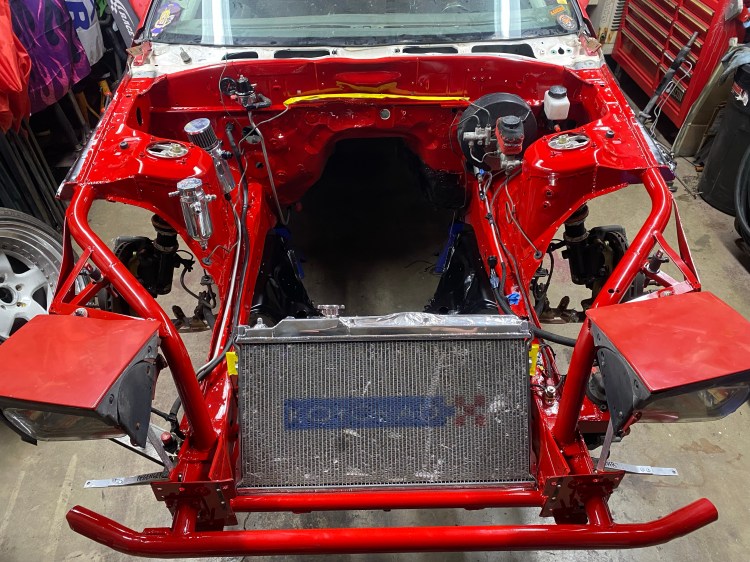
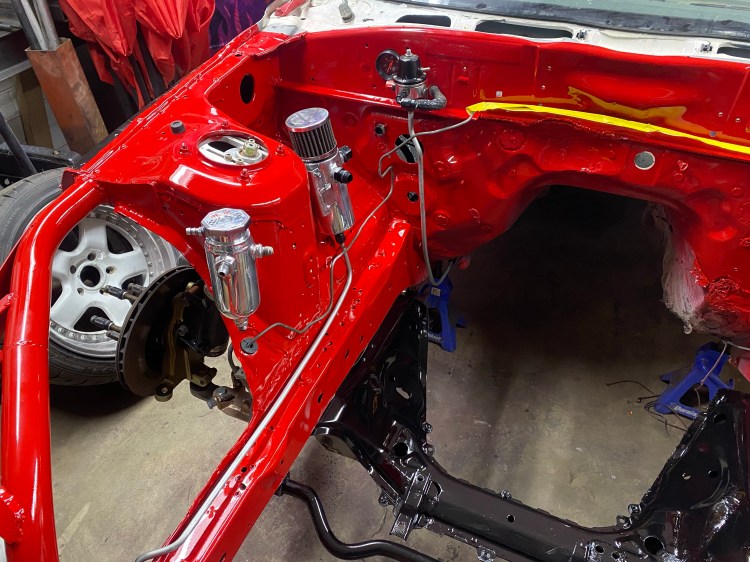
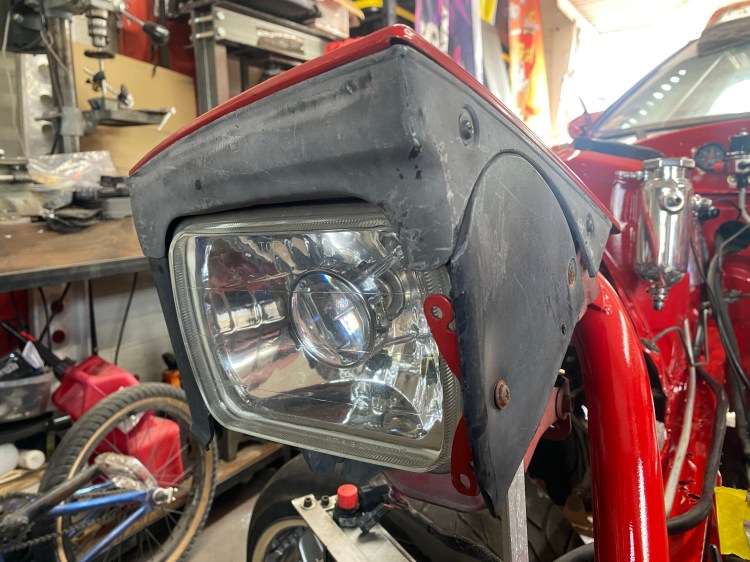
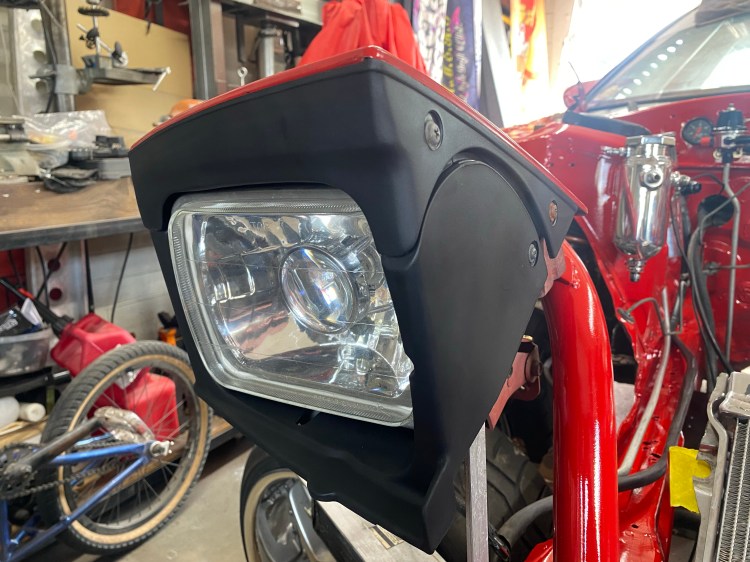
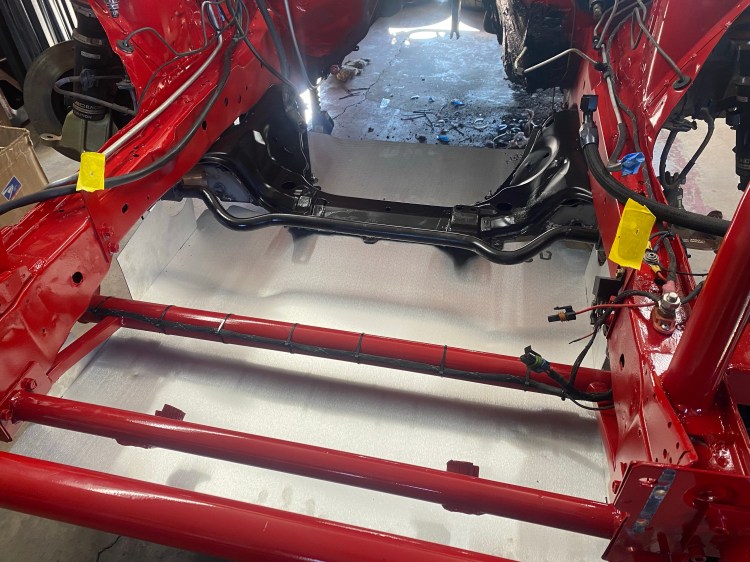
Upon removing the wiring harness the firewall bulkhead connector was full of oil from my catch can. I suspect this to be the cause of my car breaking up and giving me a hassle while trying to drive.Broken valve keeper.Broken keeper found in the head valley.Cylinder #2 wall scoring and piston damage.Cylinder #4 wall scoring and piston damage.Cylinder #2 piston scoring.Cylinder #4 piston scoring.Cylinder #2 wall scoring.Cylinder #4 wall scoring.After heavy honing, the scoring is still evident and will not be able to be reused with its current bore size. The bore is already .040″ over standard size and will require custom pistons for reuse.Compressor wheel damage.Turbine wheel damage. How did this turbo function?Sent my wiring spaghetti off the Panic to get adapted to the Link Monsoon X. Mark also added in a new TPS connector, flex fuel sensor, and OBD port.Link Monsoon X. Supertech +1mm stainless intake valves, +1mm stainless exhaust valves, manganese valve guides, and keepers.Supertech 70lbs dual valve springs, titanium retainers, spring seats, and valve seals. Weisco 79mm piston rings and Stage 8 turbo hardware.Fidanza slide cam gears, Cometic MLS .040″ headgasket, and GM flex fuel sensor.Toda timing belt because red.Garrett turbo replacement; GTX2860R Gen II supercore.Garrett supercore.Joe at Action Fab working his magic. Joe made a jig of my original manifold to build the new manifold. This ensured that I would be able to reuse by turbine housing, downpipe, and wastegate dump.Action Fab 1.25″ runner turbo manifold.RZ Crew intake manifold.RZ Crew manifold with Honda B series throttle body. This is a billet 68mm. Test fitting of ID1000 injectors with M Tuned fuel rail to determine fuel rail spacer size needed. The ones supplied with the intake manifold were for the OEM fuel rail.Removed their logo plate for a cleaner look.Still bent, won’t align, needs to be straightened.RE Amemiya aero mirrors courtesy of YAJ. These came cheap due to have a crack in the FRP, and a broken mirror glass.Parts Shop Max LCAs, knuckles, and rack spacers.BC Racing type RM extreme low coilovers with 10K front springs and 8K rear springs. The RM features an inverted strut in the front.Great pic, I knowParts Shop Max LCA’s and knuckles. BC Racing coilovers. OEM Mazda S4 balljoints and inner tie rods. Mazdatrix bumpsteer kit (not pictured). I installed the custom camber/caster plates and my old Swift springs. 10K front springs and 6K rear springs.Maziora aluminum steering wheel, thanks again to YAJ. I’ve been searching for one of these ever since I bought the car. Pat had one in the car, but wouldn’t sell it with the car. The steering wheel is super light and supposedly was made in a very limited run for demo cars in Tokyo Auto Salon. (If you have more info on these wheels please message me.)Arai Gp-7 courtesy of Ireland! This was extremely hard to find due to Arai back order.The car went to the frame rack to get straightened out as best as possible. They straightened the strut towers, frame rails, front bash bar, and tube front. Thank you for your help with this Shanna!Test fitting and aligning panels with the OEM front fenders and bumper to get the aero hood in position.hood is lined up on left side.Hood is lined up on the right side.I made lower fender braces with the OEM fenders installed to make sure the aero fenders would be in the correct position. The original fender bracing was cut off since it was distorted. Left side pictured.Original fender bracing removed and custom right fender brace installed. You can see the lovely holes I drilled to install the OEM front bumper.All aero panels and headlights installed. The left side lines up really well.The right side isn’t perfect, but much better than it was! It lines up with an OEM bumper, so I suspect the bumper to be off.Next up was to strip everything out of the engine bay. I welded shut ten large holes in the firewall to help reduce heat and keep the interior clean.Years of brake fluid spilling/leaking has taken a toll on the paint. The cash money green is showing and I don’t like it.Welded holes and peeling paint everywhere. Here we can see the OEM blue showing through.Make things shiny again!Should have had the faces polished, but I sold them anyways.New lip 4.25″ (left) and old lip 3″ (right).Now 17×9.75″ +9. These were originally 17×8.5″ +25.Black cerakote hot side parts!Manifold looking *COOL*.Downpipe also looking *COOL*.A freshly media blasted engine bay to make starting over easier. The three layers of old paint would have taken hours to strip and couldn’t have been painted over without failing. Unfortunatley they media blasted the subframe when they said they weren’t going to. The subframe would have been fine, but they media blasted the steering rack and the steering rack shafts. The rack is now unusable due to pitted shafts. *cry*This metal hasn’t been this exposed since 1987.Wrapped up and ready to shoot!Two layers of primer to help seal the bare metal.Dying because I am not painter.Engine bay now in “victory red” to match the rest of the car.“i Am NoT a PaInTeR”Not bad for a hobbyist who doesn’t know what they’re doing.Start installing shiny bits to make it even better. Blacked the tops of the fender tubs and subframe. Still need to black the cowl area.That brake booster and brake lines don’t look very appealing.Move slow and take care not to scratch anything.Yukcky and cut headlight bezels.New OEM headlight bezels.LRB unedrtray installed. This should help with cooling and keeping dirt out of the engine bay.